
If you are an IntelliJ IDE user and want to enhance your Java projects with JavaFX, this step-by-step guide will show you how to add JavaFX to your IntelliJ project. JavaFX is a powerful framework for building rich desktop applications, and integrating it into your IntelliJ project can greatly enhance your application’s user interface and functionality.
The first step in adding JavaFX to your IntelliJ project is to ensure that you have the necessary installation of JavaFX on your system. You can download the JavaFX SDK from the official Oracle website and follow the installation instructions provided. Once you have JavaFX installed, you are ready to proceed with adding it to your IntelliJ project.
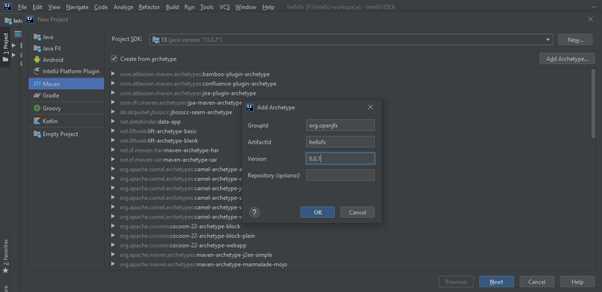
To add JavaFX to your IntelliJ project, you need to create a new module that will contain all the necessary JavaFX libraries and resources. In IntelliJ, go to File -> New -> Module and select “JavaFX” as the module type. This will create a new module specifically for your JavaFX-related files.
After creating the JavaFX module, you need to add the JavaFX library to your project. In the Project Structure dialog, go to the Dependencies tab and click on the “+” button. Select “Library” and choose “JavaFX” from the list of available libraries. This will add the necessary JavaFX library to your project and make it accessible for use in your code.
With the JavaFX library added to your project, you can now start using JavaFX in your IntelliJ project. You can create JavaFX application classes, add JavaFX components to your user interface, and take advantage of the rich features and capabilities provided by JavaFX. By adding JavaFX to your IntelliJ project, you can create visually stunning and interactive desktop applications that will impress your users.
Prerequisites

Before adding JavaFX to your IntelliJ project, make sure you have the following prerequisites:
1. IDE: You should have IntelliJ IDEA installed on your computer. If you don’t have it installed, you can download and install it from the official JetBrains website.
2. Module and Project: Create a new module and project in IntelliJ IDEA or open an existing project where you want to add JavaFX.
3. Configuration: Make sure your project is configured to use Java 11 or later. JavaFX is included in the JDK starting from Java 11, so you need to have the correct version of Java installed.
4. Adding JavaFX Library: In order to use JavaFX in your project, you need to add the JavaFX library to your project’s dependencies. This can be done by configuring the project settings in IntelliJ IDEA.
5. Installation: Ensure that you have the JavaFX SDK installed on your computer. You can download the JavaFX SDK from the official OpenJFX website. Make sure to choose the version that matches your Java version.
By fulfilling these prerequisites, you will be ready to add JavaFX to your IntelliJ project and start developing JavaFX applications.
Install Java Development Kit (JDK)
In order to configure JavaFX in your IntelliJ project, you first need to install the Java Development Kit (JDK). The JDK is a software development environment that provides the necessary tools and libraries to develop Java applications.
To install the JDK, follow these steps:
- Go to the official Oracle website and download the latest version of the JDK.
- Run the installer and follow the on-screen instructions to complete the installation process.
- After the installation is complete, open IntelliJ IDEA.
- Create a new project or open an existing one.
- Click on “File” in the top menu, then select “Project Structure”.
- In the Project Structure dialog, click on “SDKs” under the “Platform Settings” section.
- Click on the “+” button to add a new SDK.
- Select “JDK” from the dropdown menu.
- Navigate to the installation directory of the JDK and select it.
- Click “OK” to save the configuration.
Once the JDK is installed and configured in your IntelliJ project, you can proceed with adding JavaFX to your project as a module.
Download and Install IntelliJ IDEA

In order to start adding JavaFX to your IntelliJ project, you first need to have IntelliJ IDEA installed on your computer. IntelliJ IDEA is a powerful integrated development environment (IDE) that provides a wide range of features for Java development.
To download IntelliJ IDEA, you can visit the official website of JetBrains, the company behind IntelliJ IDEA. On the website, you will find the latest version of IntelliJ IDEA available for download. Make sure to choose the version that is compatible with your operating system.
Once you have downloaded the installation file, you can proceed with the installation process. The installation process is straightforward and intuitive, just like any other software installation. Simply double-click on the downloaded file and follow the on-screen instructions to complete the installation.
After the installation is complete, you can launch IntelliJ IDEA. Upon launching the IDE for the first time, you will be prompted to configure the IDE settings. You can choose the default settings or customize them according to your preferences.
Once the IDE is configured, you can create a new project or open an existing project in IntelliJ IDEA. To add JavaFX to your project, you need to configure the project settings to include the JavaFX library. This can be done by adding the JavaFX library as a dependency in the project configuration.
By following these steps, you can download and install IntelliJ IDEA on your computer. With IntelliJ IDEA installed, you can start adding JavaFX to your projects and take advantage of the powerful features provided by the IDE.
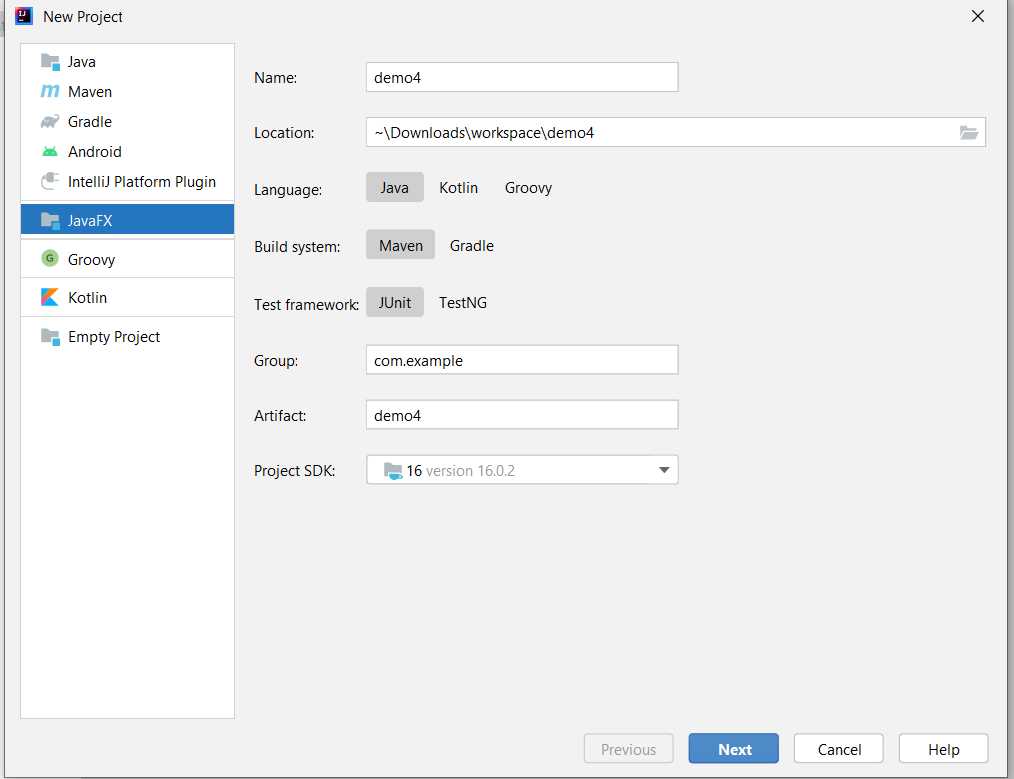
Create a New JavaFX Project in IntelliJ
To create a new JavaFX project in IntelliJ, you need to follow a few steps:
Step 1: Open IntelliJ IDEA IDE
First, open the IntelliJ IDEA IDE on your computer.
Step 2: Install JavaFX
Make sure that you have JavaFX installed on your system. If not, you can download and install it from the official JavaFX website.
Step 3: Create a New Project
Click on “Create New Project” in the IntelliJ IDEA welcome screen. Choose “JavaFX” as the project type and click “Next”.
Step 4: Configure Project Settings
Enter the project name and choose the project location. Make sure to select the appropriate JDK version. Click “Next”.
Step 5: Configure Project Structure
In the “Project Structure” window, click on the “Modules” tab. Click on the “+” button to add a new module. Choose “Java” as the module type and click “Next”.
Step 6: Add JavaFX Library
In the “Library Files” section, click on the “+” button to add a new library. Choose “JavaFX” from the list and click “Next”.
Step 7: Finish Project Configuration
Click “Finish” to complete the project configuration. IntelliJ IDEA will create the JavaFX project with the necessary module and library settings.
Now you have successfully created a new JavaFX project in IntelliJ IDEA. You can start coding and building your JavaFX application using the powerful features of the IntelliJ IDE.
Adding JavaFX Library
In order to use JavaFX in your IntelliJ project, you need to add the JavaFX library to your project’s module. IntelliJ provides an easy way to configure this library through its IDE.
Here are the steps to add the JavaFX library to your project:
- Open your project in IntelliJ IDE.
- Go to the “File” menu and select “Project Structure”.
- In the Project Structure dialog, select your project’s module.
- Click on the “Dependencies” tab.
- Click on the “+” button to add a new dependency.
- Select “Library” from the dropdown menu.
- Choose “Java” from the list of available libraries.
- Click on the “Next” button.
- Specify the installation directory of your JavaFX SDK by clicking on the “…” button next to the “Classpath” field.
- Navigate to the installation directory of your JavaFX SDK and select it.
- Click on the “OK” button to apply the changes.
By following these steps, you have successfully added the JavaFX library to your project’s module. Now you can start using JavaFX in your IntelliJ project.
Open Project Structure

In order to add JavaFX to your IntelliJ project, you need to open the Project Structure configuration. This configuration allows you to manage the libraries and modules of your project.
To open the Project Structure configuration, follow these steps:
- Open your IntelliJ IDE.
- Open your JavaFX project.
- Click on the “File” menu at the top left corner of the IDE.
- Select “Project Structure” from the dropdown menu.
By opening the Project Structure configuration, you can add the necessary libraries and modules to your JavaFX project. This will enable you to use JavaFX in your project and take advantage of its features and functionalities.
Add JavaFX Library

Adding the JavaFX library to your IntelliJ project is an essential step in configuring your IDE for JavaFX development. By adding the JavaFX library, you enable your project to utilize the JavaFX framework and its features.
To add the JavaFX library to your IntelliJ project, follow these steps:
- Open your project in IntelliJ.
- Click on “File” in the top menu, then select “Project Structure”.
- In the Project Structure window, select “Libraries” under the “Project Settings” section.
- Click on the “+” button to add a new library.
- Select “Java” from the dropdown menu.
- Navigate to the installation directory of JavaFX on your system.
- Select the “lib” folder within the JavaFX installation directory.
- Click “OK” to add the JavaFX library to your project.
Once you have added the JavaFX library, you can start using JavaFX in your project. You can import JavaFX classes, create JavaFX application windows, and utilize the various JavaFX features to build interactive and visually appealing user interfaces.
By following these steps, you have successfully added the JavaFX library to your IntelliJ project, allowing you to develop JavaFX applications with ease.
Configure Run Configuration

After adding JavaFX to your project and module, the next step is to configure the run configuration in IntelliJ IDEA. This will allow you to run your JavaFX application directly from the IDE.
To configure the run configuration, follow these steps:
- Open your project in IntelliJ IDEA.
- Click on the “Run” menu at the top of the IDE.
- Select “Edit Configurations” from the dropdown menu.
- In the left panel of the “Run/Debug Configurations” window, click on the “+” button and select “Application” from the dropdown menu.
- In the “Main class” field, enter the name of the main class of your JavaFX application.
- In the “VM options” field, add the following line of code to specify the JavaFX library path:
--module-path /path/to/javafx-sdk/lib --add-modules javafx.controls,javafx.fxml
Make sure to replace /path/to/javafx-sdk with the actual path to your JavaFX SDK installation directory.
Click on the “Apply” button to save the configuration.
Now, you can run your JavaFX application by clicking on the green “Run” button in the toolbar or by pressing the Shift + F10 shortcut.
By following these steps, you have successfully configured the run configuration for your JavaFX project in IntelliJ IDEA. You can now easily run and test your JavaFX application directly from the IDE.


