
Microsoft Word is a powerful tool for creating and editing documents, but sometimes you may need to delete a document that you no longer need or want. Whether it’s an old draft, a duplicate, or simply a document that you no longer need, deleting it from Microsoft Word is a simple process.
To delete a document from Microsoft Word, follow these step-by-step instructions:
Step 1: Open Microsoft Word and navigate to the “File” tab at the top left corner of the screen. Click on it to open the drop-down menu.
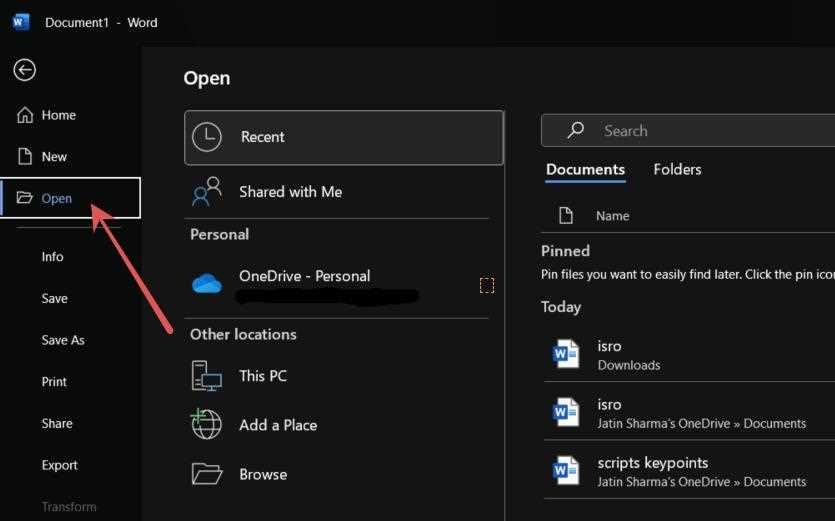
Step 2: In the drop-down menu, select “Open” to access the list of documents stored on your computer. Browse through the list and locate the document you want to delete.
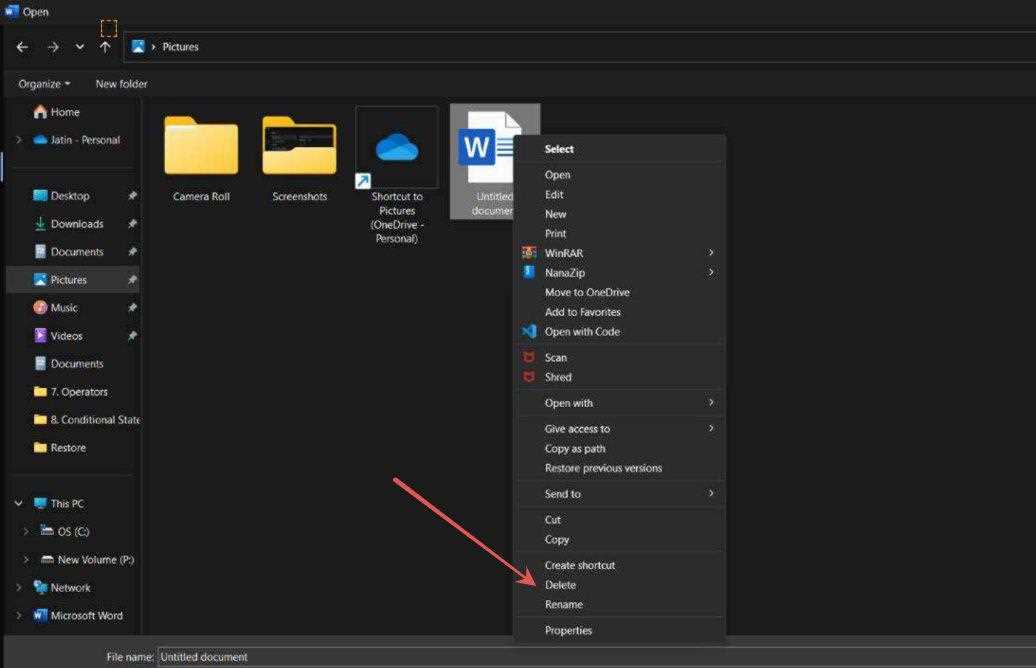
Step 3: Once you have found the document, right-click on it and select “Delete” from the options that appear. A confirmation message may appear asking if you are sure you want to delete the document. Click “Yes” to proceed with the deletion.
Step 4: After confirming the deletion, the document will be moved to the Recycle Bin or Trash on your computer. To permanently delete the document, empty the Recycle Bin or Trash.
Note: Deleting a document from Microsoft Word will permanently remove it from your computer. Make sure you have a backup or no longer need the document before proceeding with the deletion.
By following these simple steps, you can easily delete documents from Microsoft Word and free up space on your computer. Keep your documents organized and clutter-free by regularly deleting any unnecessary files. Happy deleting!
Deleting Documents in Microsoft Word
Deleting documents in Microsoft Word is a simple process that can be done in just a few steps. Whether you want to remove a single document or multiple documents, Microsoft Word provides an easy way to delete them.
To delete a document in Microsoft Word, follow these steps:
| Step 1: | Open Microsoft Word and navigate to the “File” tab at the top left corner of the screen. |
| Step 2: | Click on “Open” to access the list of documents. |
| Step 3: | Select the document you want to delete by clicking on it once. |
| Step 4: | Press the “Delete” key on your keyboard or right-click on the document and choose “Delete” from the context menu. |
| Step 5: | A confirmation dialog will appear asking if you want to move the document to the Recycle Bin. Click “Yes” to confirm the deletion. |
By following these steps, you can easily delete documents in Microsoft Word. Remember to double-check the documents you want to delete to avoid accidentally removing important files. Additionally, deleted documents can usually be recovered from the Recycle Bin if needed.
Open Microsoft Word
To delete documents from Microsoft Word, you first need to open the application. Follow these steps to open Microsoft Word:
- Click on the Windows Start button located at the bottom left corner of your screen.
- Type “Microsoft Word” in the search bar.
- Click on the Microsoft Word app icon that appears in the search results.
- Alternatively, you can also find Microsoft Word in your list of installed applications or on your desktop if you have a shortcut.
- Once Microsoft Word is open, you will see a blank document or a list of recent documents, depending on your settings.
Now that you have opened Microsoft Word, you can proceed to delete the documents you no longer need.
Locate the Document

Before you can delete a document in Microsoft Word, you need to locate it on your computer. Here are a few ways to find the document you want to delete:
| 1. File Explorer | Open File Explorer by clicking on the folder icon in the taskbar or by pressing the Windows key + E on your keyboard. Navigate to the folder where the document is saved. |
| 2. Recent Documents | If you recently worked on the document, you can find it in the Recent Documents list in Microsoft Word. Click on the File tab in the top left corner of the Word window, and then click on the “Open Recent” option. |
| 3. Search | If you’re not sure where the document is saved, you can use the search function in Windows to locate it. Click on the Start button, type the name of the document in the search bar, and press Enter. Windows will search for the document and display the results. |
Once you have located the document, you can proceed to delete it using the steps outlined in the rest of this guide.
Select the Document
To delete a document in Microsoft Word, you first need to select the document you want to delete. Here are the steps to do so:
Step 1: Open Microsoft Word on your computer.
Step 2: Click on the “File” tab located at the top left corner of the screen.
Step 3: From the drop-down menu, select “Open” to open the document you want to delete.
Step 4: Browse through your files and folders to locate the document you wish to delete.
Step 5: Once you have found the document, click on it to select it.
Step 6: After selecting the document, click on the “Delete” button located at the top right corner of the screen.
Step 7: A confirmation message will appear asking if you want to permanently delete the document. Click on “Yes” to confirm the deletion.
Note: Deleting a document is irreversible, so make sure you have selected the correct document before proceeding with the deletion.
By following these steps, you can easily select the document you want to delete in Microsoft Word and proceed with deleting it.
Permanently Deleting Documents in Microsoft Word

If you want to permanently delete a document in Microsoft Word, follow these steps:
- Open Microsoft Word on your computer.
- Click on the “File” tab at the top left corner of the screen.
- Select “Open” from the drop-down menu.
- Browse through your files and locate the document you want to delete.
- Right-click on the document and select “Delete” from the options.
- A confirmation message will appear asking if you want to move the document to the Recycle Bin. Click “Yes” to proceed.
- Open the Recycle Bin on your desktop.
- Locate the deleted document and right-click on it.
- Select “Delete” from the options to permanently remove the document from your computer.
By following these steps, you can permanently delete a document in Microsoft Word. It is important to note that once a document is permanently deleted, it cannot be recovered, so make sure you have a backup or no longer need the document before proceeding with the deletion.


