Are you wondering how to install iOS 17 on your device? Look no further! In this step-by-step guide, we will walk you through the process of installing the latest version of iOS, version 17, on your iPhone or iPad. Whether you’re a tech-savvy individual or a beginner, this guide will help you navigate through the installation process with ease.
Step 1: Check Device Compatibility
Before you begin the installation process, it’s important to check if your device is compatible with iOS 17. Apple provides a list of supported devices on their website, so make sure your device is on the list before proceeding. If your device is not compatible, you may need to consider upgrading to a newer model to enjoy the latest features and improvements of iOS 17.
Step 2: Backup Your Device
Prior to installing any software updates, it’s always a good idea to backup your device. This will ensure that your data, settings, and apps are safely stored in case anything goes wrong during the installation process. You can backup your device using iCloud or iTunes, depending on your preference. Remember to connect your device to a stable Wi-Fi network and ensure it has enough battery life to complete the backup process.
Step 3: Download and Install iOS 17
Once you’ve confirmed device compatibility and backed up your data, it’s time to download and install iOS 17. To do this, go to the Settings app on your device, then tap on General, followed by Software Update. Your device will check for available updates, and if iOS 17 is available, you will see an option to download and install it. Make sure you are connected to a Wi-Fi network and have sufficient battery life before proceeding with the installation.
Step 4: Follow the On-Screen Instructions
After initiating the installation process, your device will guide you through the remaining steps. Follow the on-screen instructions to complete the installation of iOS 17. This may involve agreeing to terms and conditions, entering your passcode, and waiting for the installation to finish. It’s important not to interrupt the installation process or turn off your device during this time.
Congratulations! You have successfully installed iOS 17 on your device. Enjoy exploring the new features and enhancements that this latest version of iOS has to offer!
Preparation

Before you begin the installation process, there are a few things you need to do to ensure a smooth and successful upgrade to iOS 17.
- Backup your device: It is always recommended to create a backup of your device before installing a new iOS version. This will allow you to restore your data in case anything goes wrong during the installation process.
- Check device compatibility: Make sure that your device is compatible with iOS 17. Not all older devices may be able to run the latest iOS version, so it’s important to check the official Apple website for a list of compatible devices.
- Free up storage space: iOS updates can take up a significant amount of storage space on your device. To ensure a smooth installation, it’s a good idea to delete any unnecessary files or apps to free up space.
- Connect to a stable Wi-Fi network: Downloading and installing iOS 17 requires a stable internet connection. Connect your device to a reliable Wi-Fi network to ensure a fast and uninterrupted download.
- Charge your device: It’s important to have enough battery life on your device before starting the installation process. Plug your device into a power source or make sure it has enough charge to complete the installation without interruption.
By following these preparation steps, you will be ready to install iOS 17 on your device and enjoy all the new features and improvements it has to offer.
Check Device Compatibility

Before attempting to install iOS 17 on your device, it is important to check if your device is compatible with the new operating system. Not all devices are capable of running the latest iOS version, so it is crucial to verify compatibility to avoid any issues during the installation process.
To check if your device is compatible with iOS 17, follow these steps:
- Check the iOS 17 compatibility list: Apple provides a list of devices that are compatible with iOS 17. Visit the official Apple website or search online to find the list and see if your device is included.
- Review the system requirements: iOS 17 may have specific system requirements that your device needs to meet. Look for information regarding minimum RAM, storage space, and processor requirements. Make sure your device meets these requirements before proceeding.
- Check for software updates: If your device is currently running an older version of iOS, check for any available software updates. Sometimes, Apple releases updates that improve device compatibility with newer iOS versions.
- Consult with Apple Support: If you are unsure about your device’s compatibility or have any questions, it is recommended to reach out to Apple Support for assistance. They can provide you with accurate information and guide you through the process.
By following these steps, you can ensure that your device is compatible with iOS 17 before attempting to install it. This will help prevent any potential issues and ensure a smooth installation process.
Backup Your Data

Before you proceed to install iOS 17 on your device, it is crucial to backup your data. This step ensures that you don’t lose any important information during the installation process.
To backup your data, follow these steps:
- Connect your device to a stable internet connection: Make sure your device is connected to a Wi-Fi network or has a strong cellular signal.
- Open the Settings app: Locate the Settings app on your device’s home screen and tap on it to open.
- Tap on your Apple ID: Scroll down and tap on your Apple ID at the top of the Settings menu.
- Select iCloud: In the Apple ID menu, select the “iCloud” option.
- Tap on iCloud Backup: Scroll down and tap on the “iCloud Backup” option.
- Enable iCloud Backup: Toggle the switch next to “iCloud Backup” to enable it. If it is already enabled, you can proceed to the next step.
- Tap on “Back Up Now”: Tap on the “Back Up Now” option to start the backup process. Make sure your device is connected to a power source to prevent any interruptions.
- Wait for the backup to complete: The backup process may take some time, depending on the size of your data and the speed of your internet connection. Ensure that the backup is successfully completed before proceeding.
By following these steps, you can backup your data to iCloud and ensure that your important information is safe before you install iOS 17 on your device. It is always recommended to have a recent backup in case anything goes wrong during the installation process.
Ensure Sufficient Storage Space
Before you begin the installation process of iOS 17, it is crucial to ensure that your device has sufficient storage space available. Upgrading to a new operating system requires a certain amount of free space to accommodate the installation files and the new features of iOS 17.
To check the available storage on your device, follow these steps:
| Step | Instructions |
|---|---|
| 1 | Open the Settings app on your device. |
| 2 | Scroll down and tap on “General”. |
| 3 | Select “iPhone Storage” or “iPad Storage”, depending on your device. |
| 4 | You will see a breakdown of the storage usage on your device. Check the available space and make sure it is sufficient for the iOS 17 installation. |
If you find that your device does not have enough storage space, you can free up space by deleting unnecessary apps, photos, videos, or other files. Alternatively, you can transfer files to iCloud or an external storage device to create more space.
Once you have confirmed that your device has enough storage space, you can proceed with the installation of iOS 17 following the step-by-step guide provided.
Download and Install iOS 17
To install iOS 17 on your device, follow the step-by-step guide below:
1. Ensure that your device is compatible with iOS 17. Check the official Apple website for a list of supported devices.
2. Connect your device to a stable Wi-Fi network. This is important as the iOS 17 update is a large file and requires a fast and reliable internet connection.
3. Go to the Settings app on your device and tap on “General”.
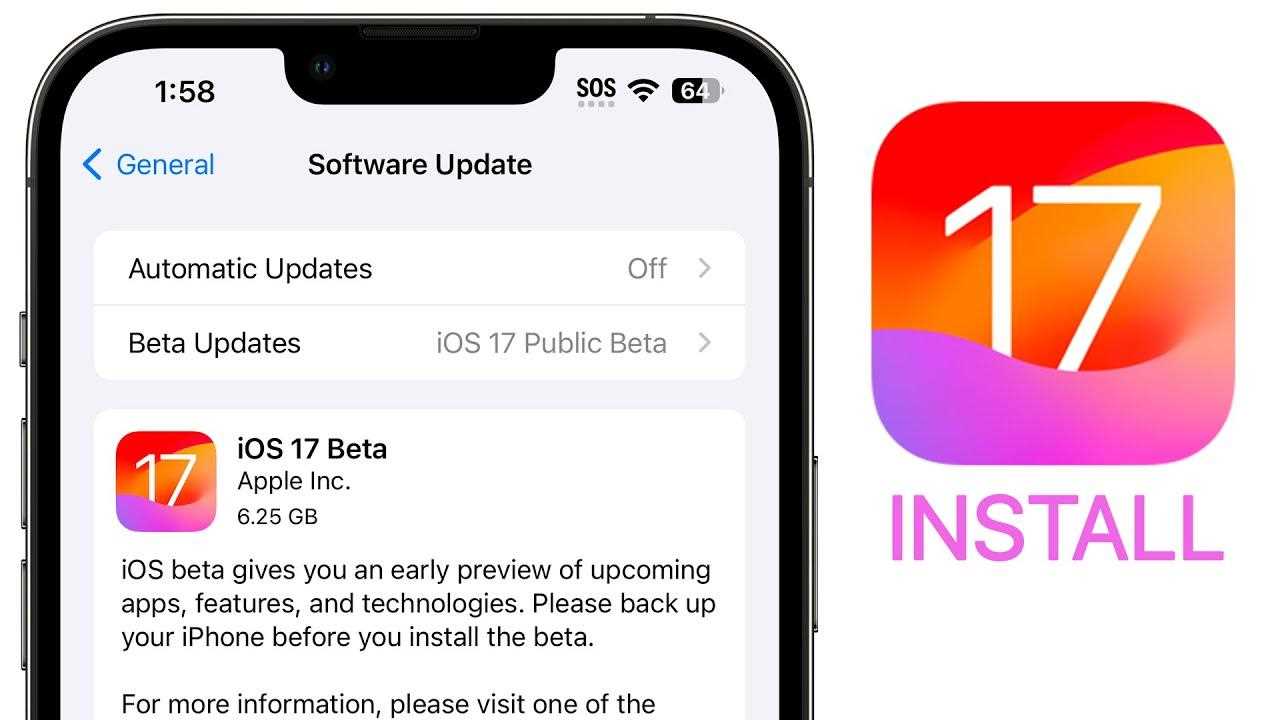
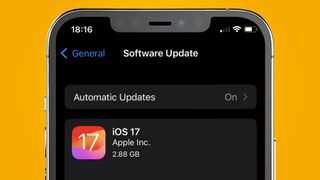
4. Scroll down and tap on “Software Update”.
5. Your device will check for the latest iOS 17 update. If it is available, tap on “Download and Install”.
6. Enter your device passcode if prompted.
7. Read and agree to the terms and conditions.
8. The iOS 17 update will begin downloading. This may take some time depending on your internet connection speed.
9. Once the download is complete, tap on “Install Now”.
10. Your device will restart and begin the installation process.
11. Follow the on-screen instructions to complete the installation.
12. After the installation is complete, your device will restart again.
13. Congratulations! You have successfully installed iOS 17 on your device.
Remember to regularly check for software updates to ensure that your device is running the latest version of iOS.
Connect to a Stable Wi-Fi Network

Before proceeding with the installation of iOS 17, it is crucial to connect your device to a stable Wi-Fi network. This will ensure a smooth and uninterrupted download and installation process.
To connect to a Wi-Fi network, follow these steps:
- Unlock your device and go to the Settings app.
- Scroll down and tap on “Wi-Fi”.
- Toggle the Wi-Fi switch to the “On” position.
- A list of available Wi-Fi networks will appear. Select the network you want to connect to.
- If the network is password-protected, enter the password and tap “Join”.
- Your device will now connect to the Wi-Fi network. Once connected, you will see a checkmark next to the network name.
It is important to choose a stable Wi-Fi network with a strong signal strength. This will ensure a faster and more reliable download of the iOS 17 update.
Go to Settings

To install iOS 17 on your device, you need to go to the Settings app. Here’s how:
1. Unlock your device and navigate to the home screen.
2. Look for the Settings app icon, which resembles a gear. It is usually located on the home screen or in the app drawer.
3. Tap on the Settings app icon to open it.
4. Once you are in the Settings app, scroll down and look for the “General” option. Tap on it.
5. In the General settings, scroll down again and look for the “Software Update” option. Tap on it.
6. The Software Update page will show you if there is an available update for your device. If iOS 17 is listed, tap on “Download and Install” to begin the installation process.
7. Follow the on-screen instructions to complete the installation of iOS 17 on your device.
It is important to note that before installing any major software update, it is recommended to back up your device to prevent data loss. Additionally, make sure your device is connected to a stable Wi-Fi network and has sufficient battery life to complete the installation process.
Tap on General

Once you have successfully installed iOS 17 on your device, the next step is to navigate to the Settings app. To do this, simply tap on the “Settings” icon on your home screen.
Once you are in the Settings app, scroll down until you see the option for “General”. Tap on it to proceed.
In the General settings, you will find a variety of options and features that you can customize to your liking. This is where you can make changes to your device’s language, accessibility settings, and more.
Take some time to explore the General settings and familiarize yourself with the various options available. You may find some hidden gems that can enhance your overall iOS 17 experience.
Once you have finished exploring the General settings, you can proceed to further customize your device by tapping on other options such as “Display & Brightness”, “Sounds & Haptics”, and “Privacy”. These settings allow you to fine-tune your device’s appearance, audio settings, and privacy preferences.
By tapping on General, you are taking the first step towards fully optimizing your iOS 17 experience. So go ahead, tap away, and make your device truly yours!
Select Software Update

Once you have successfully downloaded and installed iOS 17 on your device, it’s time to select the software update. This step is crucial as it ensures that your device is running the latest version of iOS 17 and that any bugs or issues have been fixed.
To select the software update, follow these steps:
- Go to the Settings app on your device.
- Scroll down and tap on “General”.
- Tap on “Software Update”.
- Your device will now check for any available updates.
- If an update is available, tap on “Download and Install”.
- Enter your passcode if prompted.
- Read and agree to the terms and conditions.
- Wait for the update to download and install.
- Your device will restart once the update is complete.
It is important to note that the update process may take some time, depending on the size of the update and your internet connection speed. Make sure your device is connected to a stable Wi-Fi network and has sufficient battery power before starting the update.
Once the update is complete, your device will be running the latest version of iOS 17, with all the new features and improvements that come with it. Enjoy exploring the new iOS 17 and its enhanced capabilities!