
If you’re a gaming enthusiast, you know that Xbox games offer an incredible gaming experience. But what if you don’t have an Xbox console? Don’t worry! You can still enjoy Xbox games on your PC. In this step-by-step guide, we’ll show you how to install Xbox games on your PC, so you can dive into the world of gaming without needing a console.
The first step is to ensure that your PC meets the system requirements for the Xbox game you want to install. Check the game’s official website or the packaging for the minimum system requirements. This will include information about the operating system, processor, RAM, and graphics card needed to run the game smoothly.
Once you’ve confirmed that your PC meets the requirements, you’ll need to purchase the game. You can do this through the Microsoft Store or other authorized retailers. Make sure to choose the digital version of the game, as physical discs are designed for Xbox consoles and won’t work on your PC.
After purchasing the game, you’ll need to download and install the Xbox app on your PC. This app acts as a hub for all your Xbox games and provides access to various features, such as multiplayer gaming and game streaming. You can download the Xbox app from the Microsoft Store or the official Xbox website.
Once the Xbox app is installed, open it and sign in with your Microsoft account. This is the same account you used to purchase the game. After signing in, navigate to the “Library” section of the app, where you’ll find a list of all your purchased games. Locate the game you want to install and click on the “Install” button.
The installation process may take some time, depending on the size of the game and the speed of your internet connection. Once the installation is complete, you can launch the game from the Xbox app and start playing. Remember to connect a compatible controller to your PC for the best gaming experience.
Now that you know how to install Xbox games on your PC, you can enjoy a wide range of gaming options without needing a console. Whether you’re a casual gamer or a hardcore enthusiast, this guide will help you get started on your gaming journey. So grab your PC, install your favorite Xbox games, and get ready to embark on epic gaming adventures!
Section 1: Preparing Your PC

Before you can install Xbox games on your PC, you need to make sure that your PC meets the necessary requirements. Here are the steps to prepare your PC:
Step 1: Check the system requirements for the Xbox games you want to install. Make sure your PC meets or exceeds the minimum specifications.
Step 2: Ensure that your PC has enough storage space to accommodate the games you want to install. Xbox games can take up a significant amount of space, so it’s important to have enough free storage.
Step 3: Update your PC’s operating system to the latest version. This ensures that you have the necessary software updates and security patches to run Xbox games smoothly.
Step 4: Install the Xbox app on your PC. This app allows you to access and manage your Xbox games library on your PC.
Step 5: Connect your PC to the internet. Some Xbox games may require an internet connection for installation or updates.
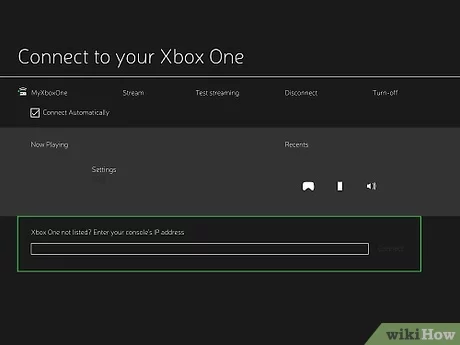
Step 6: Make sure your PC meets the hardware requirements for Xbox game streaming, if you plan to stream games from your Xbox console to your PC.
By following these steps, you can ensure that your PC is ready to install Xbox games and provide you with a seamless gaming experience.
Checking System Requirements
Before installing games on your Xbox to play on your PC, it is important to check if your system meets the necessary requirements. This will ensure that you have a smooth gaming experience without any technical issues.
Step 1: Make sure that your PC meets the minimum system requirements for the game you want to install. These requirements can usually be found on the game’s official website or on the Xbox app.
Step 2: Check if your PC has the necessary hardware components, such as a compatible graphics card, sufficient RAM, and a suitable processor. These specifications are crucial for the game to run properly.
Step 3: Ensure that your PC has enough storage space to accommodate the game. Games can take up a significant amount of space, so it is important to have enough free storage on your hard drive.
Step 4: Verify that your PC is running on a compatible operating system. Some games may only be compatible with specific versions of Windows, so it is important to check if your operating system meets the requirements.
Step 5: Check if your PC meets the recommended system requirements for the game. While the minimum requirements are necessary for the game to run, the recommended requirements will provide a better gaming experience with improved graphics and performance.
By following these steps and ensuring that your PC meets the necessary system requirements, you can proceed with confidence to install Xbox games on your PC and enjoy a seamless gaming experience.
Updating Windows
Before you can install Xbox games on your PC, it is important to ensure that your Windows operating system is up to date. Updating Windows is crucial as it ensures that your PC has the necessary system requirements to run Xbox games smoothly.
To update Windows, follow these steps:
- Click on the “Start” button in the bottom left corner of your screen.
- Select “Settings” from the menu that appears.
- In the Settings window, click on “Update & Security”.
- Click on “Windows Update” in the left sidebar.
- Click on the “Check for updates” button.
- If there are any available updates, click on the “Install now” button to start the update process.
- Wait for the updates to download and install. This may take some time depending on the size of the updates and your internet connection speed.
- Once the updates are installed, restart your PC to complete the update process.
It is recommended to keep your Windows operating system up to date to ensure the best performance and compatibility when installing Xbox games on your PC. Regularly checking for and installing updates will also help keep your PC secure from any potential vulnerabilities.
Note: If you are using an older version of Windows, such as Windows 7 or Windows 8, it is recommended to upgrade to Windows 10 for the best compatibility with Xbox games.
Installing Xbox App

To install Xbox games on your PC, you will need to download and install the Xbox app. The Xbox app allows you to access your Xbox games library and play them on your PC.
Here is a step-by-step guide on how to install the Xbox app on your PC:
- Open your web browser and go to the official Xbox website.
- Click on the “Downloads” section of the website.
- Scroll down and find the Xbox app download link.
- Click on the download link to start downloading the Xbox app installer.
- Once the download is complete, locate the installer file on your PC.
- Double-click on the installer file to run it.
- Follow the on-screen instructions to install the Xbox app on your PC.
- Once the installation is complete, launch the Xbox app.
- Sign in to your Xbox account or create a new one if you don’t have an account yet.
- After signing in, you will be able to access your Xbox games library and install them on your PC.
Now that you have installed the Xbox app on your PC, you can start downloading and playing your favorite Xbox games on your computer. Enjoy!
Section 2: Installing Xbox Games
Installing Xbox games on your PC is a straightforward process that allows you to enjoy your favorite games without the need for a console. Here’s how to do it:
- Make sure your PC meets the system requirements for the Xbox game you want to install. Check the game’s official website or the Microsoft Store for the minimum specifications.
- Open the Microsoft Store on your PC.
- Search for the Xbox game you want to install using the search bar at the top of the Microsoft Store window.
- Click on the game’s title to open its store page.
- Click on the “Install” button to begin the installation process.
- Wait for the game to download and install on your PC. The time it takes will depend on the size of the game and the speed of your internet connection.
- Once the installation is complete, you can launch the game from your PC’s Start menu or desktop shortcut.
- Follow any additional prompts or instructions that may appear to complete the installation process.
- Enjoy playing your Xbox game on your PC!
Remember to check for any updates or patches for the game to ensure you have the latest version and the best gaming experience. You can also connect an Xbox controller to your PC for a more immersive gaming experience.
Opening Xbox App
To install Xbox games on your PC, you will need to open the Xbox app. Here’s how:
1. Launch the Xbox app on your PC. You can find it by searching for “Xbox” in the Start menu.
2. If you don’t have the Xbox app installed, you can download it from the Microsoft Store.
3. Once the Xbox app is open, sign in with your Microsoft account. If you don’t have one, you will need to create a new account.
4. After signing in, you will be able to access the Xbox Store and browse through the available games.
5. To install a game, simply click on the game you want and then click on the “Install” button.
6. The game will begin downloading and installing on your PC. The time it takes will depend on the size of the game and your internet connection speed.
7. Once the game is installed, you can launch it from the Xbox app and start playing!
That’s it! Now you know how to open the Xbox app and install games on your PC. Enjoy your gaming experience!


