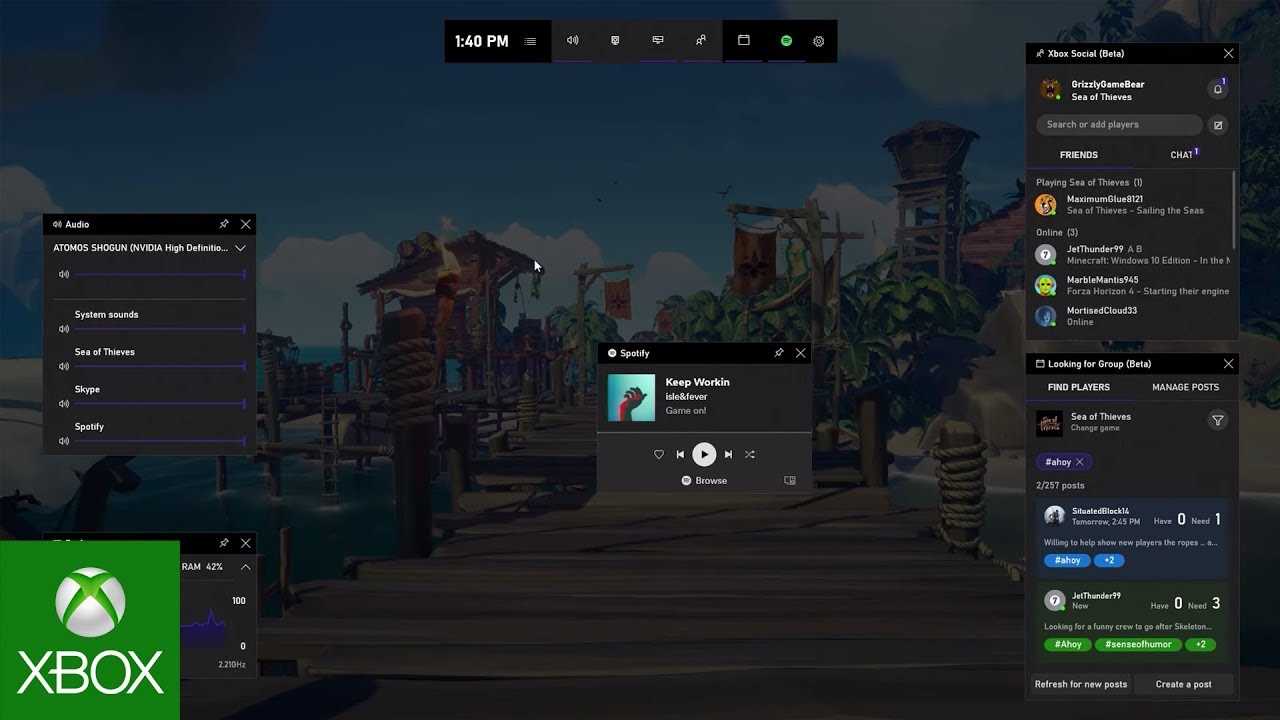
If you’re an avid gamer, you know how important it is to have the right tools to enhance your gaming experience. One such tool is the Xbox Game Bar, a powerful application that allows you to capture screenshots, record gameplay, and interact with your friends while playing games on your PC.
Installing the Xbox Game Bar on your PC is a straightforward process that can be done in just a few simple steps. In this step-by-step guide, we will walk you through the installation process, ensuring that you can start using this amazing tool in no time.
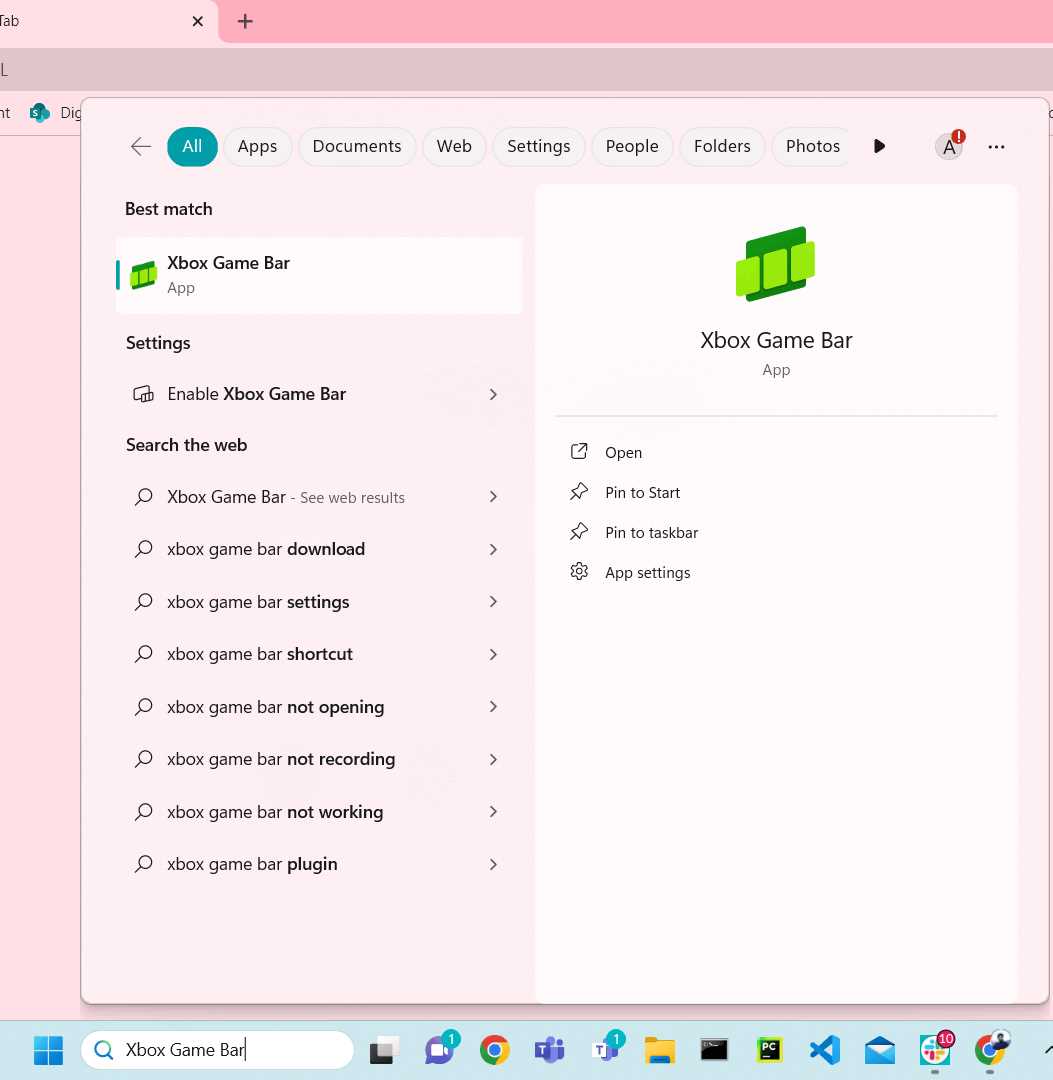
To install the Xbox Game Bar, you will need an Xbox Live account and a PC running Windows 10. Once you have these requirements, you can proceed with the installation process. First, open the Microsoft Store on your PC and search for “Xbox Game Bar” in the search bar. Click on the app in the search results to open its page.
On the Xbox Game Bar page, click on the “Get” button to start the installation process. The app will begin downloading and installing automatically. Once the installation is complete, you can launch the Xbox Game Bar by searching for it in the Start menu or by pressing the Windows key + G on your keyboard.
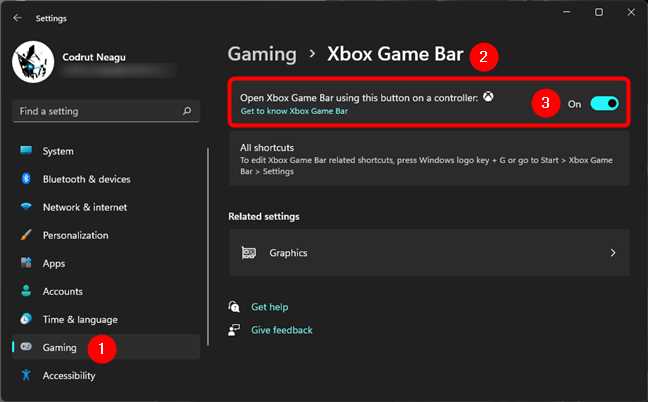
Now that you have successfully installed the Xbox Game Bar on your PC, you can customize its settings to suit your preferences. You can access the settings by clicking on the gear icon in the Xbox Game Bar overlay. From there, you can adjust various options such as the keyboard shortcuts, audio settings, and notifications.
With the Xbox Game Bar installed and customized, you are now ready to take your gaming experience to the next level. Whether you want to capture epic moments, chat with your friends, or record gameplay videos, the Xbox Game Bar has got you covered. Enjoy your gaming sessions like never before with this powerful and versatile tool!
Section 1: Preparing Your PC
Before you can install the Xbox Game Bar on your PC, you need to make sure your system meets the necessary requirements. Here’s how to prepare your PC for the installation:
1. Check your operating system: The Xbox Game Bar is compatible with Windows 10, so make sure you have the latest version installed on your PC.
2. Verify your system specifications: Ensure that your PC meets the minimum system requirements for the Xbox Game Bar. This includes having at least 8GB of RAM, a DirectX 12 compatible GPU, and a compatible processor.
3. Update your graphics drivers: It’s important to have the latest graphics drivers installed on your PC to ensure optimal performance. Visit the website of your GPU manufacturer and download the latest drivers for your specific model.
4. Check for available storage space: The Xbox Game Bar requires a certain amount of free storage space to install. Make sure you have enough space available on your hard drive or SSD.
5. Disable any conflicting software: Some antivirus or firewall programs may interfere with the installation process. Temporarily disable these programs or add an exception for the Xbox Game Bar installer.
By following these steps, you will ensure that your PC is ready for the installation process. Once you have completed these preparations, you can proceed to the next section to learn how to install the Xbox Game Bar on your PC.
Checking System Requirements
Before you can install Xbox Game Bar on your PC, it’s important to check if your system meets the necessary requirements. This will ensure that you have a smooth and seamless installation process.
Xbox: Make sure you have an Xbox account and are signed in. If you don’t have an account, you can create one for free on the Xbox website.
Install Windows 10: Xbox Game Bar is only available for Windows 10, so make sure you have the latest version of Windows installed on your PC. If you are not sure which version you have, you can check by going to Settings > System > About.
System Requirements: Your PC should meet the minimum system requirements to run Xbox Game Bar smoothly. These requirements include a 64-bit processor, at least 4GB of RAM, and a DirectX 12-compatible graphics card. It’s also recommended to have a solid internet connection for the best gaming experience.
How to Check: To check if your PC meets the system requirements, you can use the DirectX Diagnostic Tool. Simply press the Windows key + R to open the Run dialog box, then type “dxdiag” and press Enter. The DirectX Diagnostic Tool will open, and you can check the information under the System tab.
Updating Drivers: It’s also important to make sure that your graphics card drivers are up to date. Outdated drivers can cause compatibility issues and affect the performance of Xbox Game Bar. You can update your drivers by visiting the website of your graphics card manufacturer and downloading the latest drivers for your specific model.
By checking your system requirements and ensuring that your PC meets the necessary criteria, you can proceed with confidence to install Xbox Game Bar and enjoy all its features and functionalities.
Updating Windows

In order to install Xbox Game Bar on your PC, it is important to make sure that your Windows operating system is up to date. Updating Windows is a crucial step to ensure that you have the latest features and security patches that are necessary for the smooth functioning of the Xbox Game Bar.
To update Windows, follow these steps:
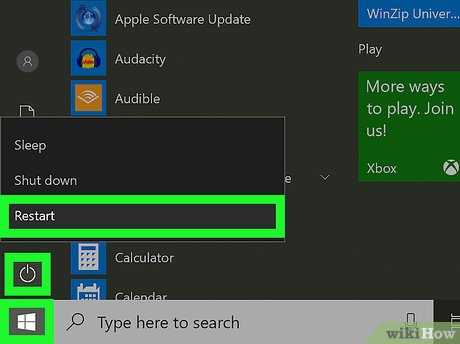
| Step 1: | Click on the “Start” button located at the bottom left corner of your screen. |
| Step 2: | Go to “Settings” by clicking on the gear icon in the Start menu. |
| Step 3: | In the Settings window, click on “Update & Security”. |
| Step 4: | Click on “Windows Update” in the left-hand menu. |
| Step 5: | Click on the “Check for updates” button. |
| Step 6: | If there are any available updates, Windows will automatically download and install them. |
| Step 7: | Once the updates are installed, restart your PC to complete the update process. |
After updating Windows, you can proceed with the installation of Xbox Game Bar on your PC. Having the latest version of Windows ensures that you have the best gaming experience and access to all the features that the Xbox Game Bar has to offer.
Disabling Antivirus Software
Before you begin the installation process for Xbox Game Bar, it is recommended to temporarily disable your antivirus software. This step is necessary to prevent any interference or conflicts that may occur during the installation process.
Here are the general steps to disable your antivirus software:
| Step | Description |
|---|---|
| 1 | Locate the antivirus software icon in your system tray or taskbar. |
| 2 | Right-click on the icon to open the antivirus software’s menu. |
| 3 | Look for an option that says “Disable” or “Turn off” and click on it. |
| 4 | A confirmation prompt may appear, asking if you want to disable the antivirus software temporarily. Click “Yes” or “OK” to proceed. |
| 5 | Once the antivirus software is disabled, you can proceed with the installation of Xbox Game Bar. |
Remember to re-enable your antivirus software after the installation is complete to ensure the ongoing protection of your system.
Disabling your antivirus software temporarily is a common practice when installing new software or making system changes. It helps to prevent any false positives or conflicts that may occur during the installation process.
Now that you know how to disable your antivirus software, you can proceed with the installation of Xbox Game Bar and enjoy all the features it has to offer!
Section 2: Installing Xbox Game Bar
To install Xbox Game Bar on your PC, follow these steps:
Step 1: Open the Microsoft Store on your PC.
Step 2: Search for “Xbox Game Bar” in the search bar at the top right corner of the Microsoft Store.
Step 3: Click on the Xbox Game Bar app from the search results.
Step 4: Click on the “Install” button on the Xbox Game Bar app page.
Step 5: Wait for the installation process to complete. This may take a few minutes depending on your internet connection speed.
Step 6: Once the installation is complete, you can launch Xbox Game Bar by clicking on the “Launch” button on the Xbox Game Bar app page.
Note: Xbox Game Bar is only available for Windows 10 PCs with the May 2019 Update or later. Make sure your PC meets the system requirements before installing the app.