Are you a Mac user who wants to explore the world of Ubuntu? Look no further! In this step-by-step guide, we will show you how to install Ubuntu on your Mac using VirtualBox. VirtualBox is a powerful virtualization software that allows you to run different operating systems on your Mac, including Ubuntu.
Why Ubuntu?
Ubuntu is a popular Linux distribution known for its user-friendly interface and vast software library. It is a great choice for both beginners and advanced users who want to experience the power and flexibility of Linux. By installing Ubuntu on your Mac, you can enjoy the best of both worlds – the stability and security of Mac OS, and the versatility of Ubuntu.
Installing Ubuntu on VirtualBox
Now, let’s get started with the installation process. Follow these step-by-step instructions to install Ubuntu on your Mac using VirtualBox:
Section 1: Preparing for Installation
Before you can install Ubuntu on your Mac using VirtualBox, you need to make sure you have everything you need. Follow these steps to prepare for the installation:
| Step 1: | Make sure you have a Mac computer running the latest version of macOS. |
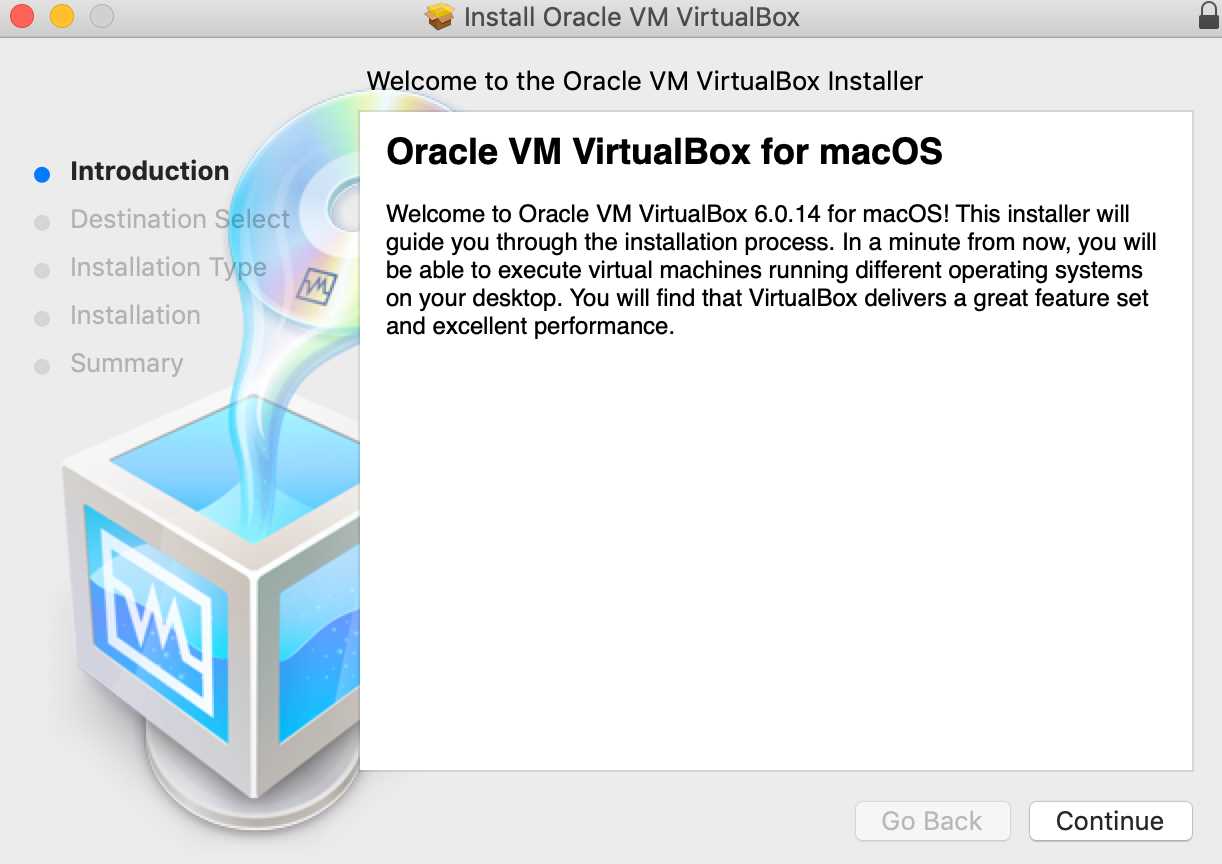
| Step 2: | Download and install VirtualBox on your Mac. VirtualBox is a free and open-source virtualization software that allows you to run different operating systems on your computer. |
| Step 3: | Download the Ubuntu ISO file. You can get the latest version of Ubuntu from the official Ubuntu website. |
| Step 4: | Create a new virtual machine in VirtualBox. This will be the environment where you will install Ubuntu. |
| Step 5: | Allocate enough resources to the virtual machine. Make sure you have enough memory, storage, and CPU power to run Ubuntu smoothly. |
| Step 6: | Configure the virtual machine settings. Set the desired amount of RAM, create a virtual hard disk, and choose the Ubuntu ISO file as the installation media. |
| Step 7: | Start the virtual machine and begin the Ubuntu installation process. |
By following these steps, you will be well-prepared to install Ubuntu on your Mac using VirtualBox. Make sure to carefully follow the instructions in the next sections to ensure a successful installation.
Checking System Requirements
Before you proceed with the installation process, make sure your system meets the following requirements:
- A Mac computer running macOS
- VirtualBox installed on your Mac
- An Ubuntu ISO file
To install Ubuntu on VirtualBox, you need to have VirtualBox installed on your Mac. If you don’t have it yet, you can download it from the official VirtualBox website and follow the installation instructions.
Once you have VirtualBox installed, you will also need an Ubuntu ISO file. You can download the latest version of Ubuntu from the official Ubuntu website. Make sure to choose the appropriate version for your system.
With these requirements met, you are ready to proceed with the installation process. The next steps will guide you on how to install Ubuntu on VirtualBox on your Mac.
Downloading VirtualBox
To install Ubuntu on your Mac using VirtualBox, you will first need to download and install VirtualBox on your computer. VirtualBox is a free and open-source virtualization software that allows you to run multiple operating systems on your Mac.
Here is a step-by-step guide on how to download VirtualBox:
- Open your web browser and go to the official VirtualBox website.
- Click on the “Downloads” tab at the top of the page.
- On the downloads page, you will see a list of available versions of VirtualBox for different operating systems. Click on the “OS X hosts” link to download the latest version of VirtualBox for Mac.
- Once the download is complete, locate the downloaded file and double-click on it to start the installation process.
- Follow the on-screen instructions to complete the installation of VirtualBox on your Mac.
After VirtualBox is installed on your Mac, you will be ready to proceed with the next steps to install Ubuntu on VirtualBox.
Downloading Ubuntu ISO
To install Ubuntu on your Mac using VirtualBox, you will first need to download the Ubuntu ISO file. The ISO file contains the installation files for Ubuntu, which you will later use to create a virtual machine in VirtualBox.
Here are the steps to download the Ubuntu ISO:
- Open a web browser on your Mac.
- Go to the official Ubuntu website at ubuntu.com.
- Click on the “Download” button.
- On the download page, you will see different versions of Ubuntu available. Choose the version that is compatible with your Mac.
- Once you have selected the version, click on the “Download” button next to it.
- The ISO file will start downloading to your Mac. This may take some time depending on your internet connection speed.
After the download is complete, you will have the Ubuntu ISO file ready to be used for the installation process in VirtualBox.
Section 2: Creating a New Virtual Machine
Now that you have VirtualBox installed on your Mac, it’s time to create a new virtual machine to install Ubuntu. Follow these steps to get started:
Step 1: Open VirtualBox on your Mac by clicking on the application icon in your Applications folder.
Step 2: Click on the “New” button in the top left corner of the VirtualBox window to start the new virtual machine creation process.
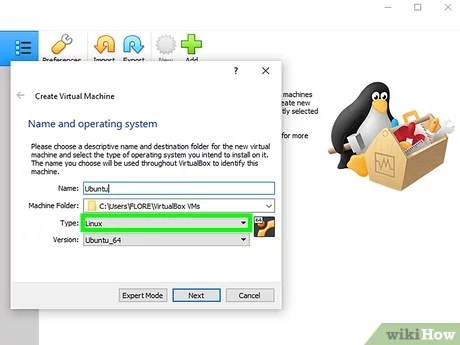
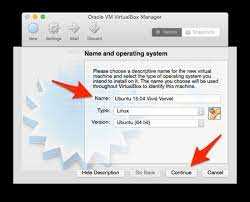
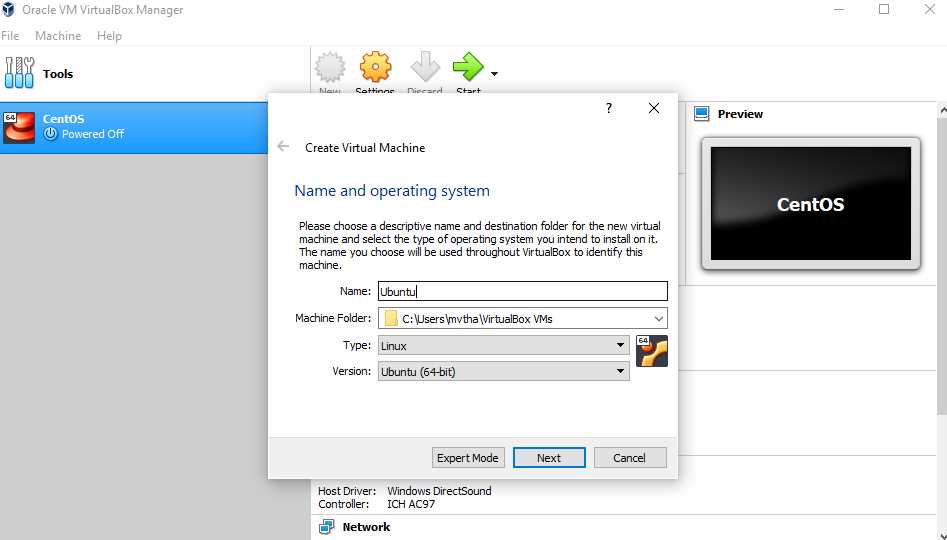
Step 3: In the “Name and operating system” window, enter a name for your virtual machine, such as “Ubuntu”, and select “Linux” as the type and “Ubuntu (64-bit)” as the version. Click “Next” to continue.
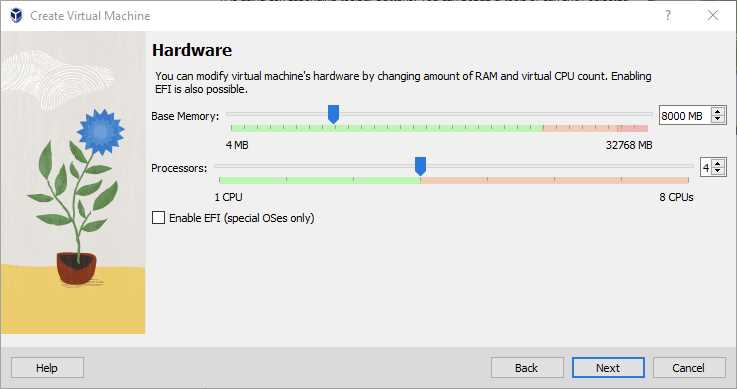
Step 4: In the “Memory size” window, allocate the amount of RAM you want to assign to your virtual machine. It is recommended to allocate at least 2GB of RAM for a smooth Ubuntu experience. Click “Next” to proceed.
Step 5: In the “Hard disk” window, select “Create a virtual hard disk now” and click “Create” to continue.
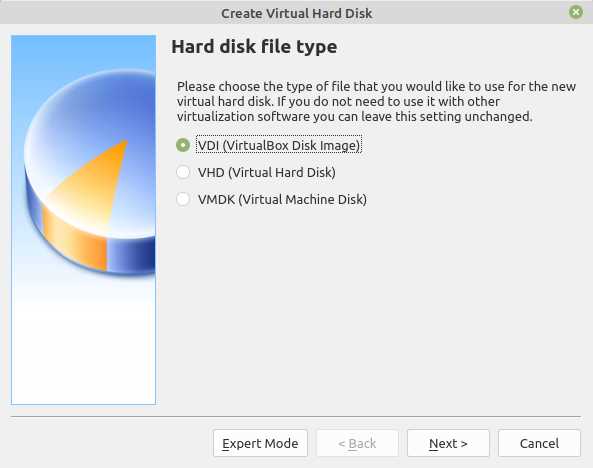
Step 6: In the “Hard disk file type” window, select “VDI (VirtualBox Disk Image)” and click “Next”.
Step 7: In the “Storage on physical hard disk” window, select “Dynamically allocated” and click “Next”.
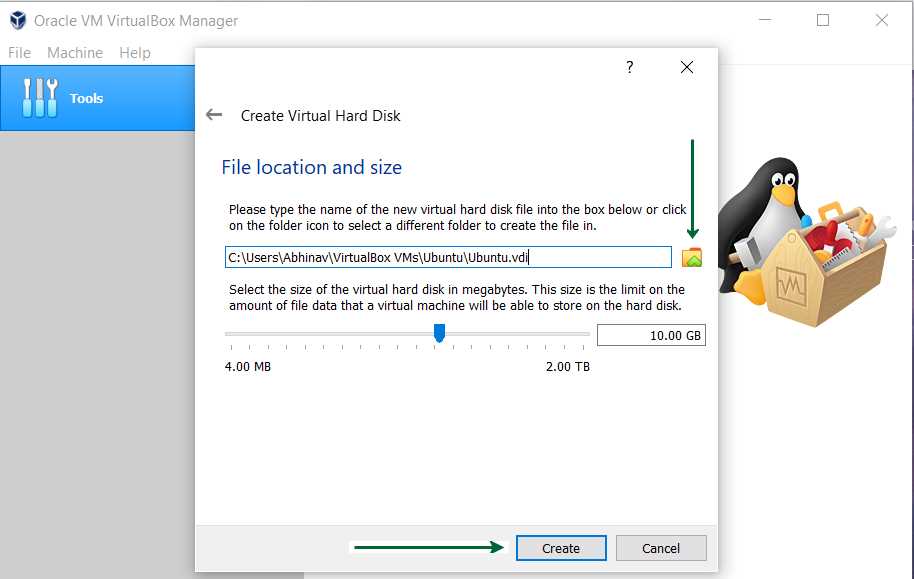
Step 8: In the “File location and size” window, choose a location to save your virtual machine files and allocate a size for the virtual hard disk. It is recommended to allocate at least 20GB of disk space. Click “Create” to proceed.
Step 9: Congratulations! You have successfully created a new virtual machine for Ubuntu on your Mac using VirtualBox. In the next section, we will learn how to install Ubuntu on this virtual machine.
Opening VirtualBox
To install Ubuntu on a Mac using VirtualBox, you first need to open VirtualBox on your Mac. VirtualBox is a free and open-source virtualization software that allows you to run multiple operating systems on your computer.
Here’s how to open VirtualBox:
- Click on the “Finder” icon in the Dock to open a Finder window.
- In the menu bar at the top of the screen, click on “Go” and then select “Applications”.
- In the Applications folder, locate and double-click on the “VirtualBox” icon.
Once VirtualBox is open, you will be able to create a new virtual machine and install Ubuntu on it. Follow the step-by-step guide to proceed with the installation process.
Note: Make sure you have downloaded and installed VirtualBox on your Mac before proceeding with these steps.
Clicking on “New”
Once you have VirtualBox installed on your Mac, you can proceed with the installation of Ubuntu. To do this, open VirtualBox and click on the “New” button in the top-left corner of the window.
A new window will appear, prompting you to enter a name for your virtual machine. This name can be anything you like, but it’s a good idea to choose something descriptive that will help you identify the Ubuntu installation later on.
Next, you’ll need to select the operating system type and version. In this case, you’ll want to choose “Linux” as the type and “Ubuntu (64-bit)” as the version. If you’re installing a different version of Ubuntu or using a different architecture, make sure to select the appropriate options.
After selecting the operating system type and version, you’ll need to allocate memory to your virtual machine. The amount of memory you allocate will depend on the specifications of your Mac and how much you want to dedicate to Ubuntu. It’s generally recommended to allocate at least 2GB of memory for a smooth Ubuntu experience.
Once you’ve allocated memory, you’ll need to create a virtual hard disk for your Ubuntu installation. Select the “Create a virtual hard disk now” option and click on the “Create” button.
In the next window, you’ll be prompted to choose the hard disk file type. The default option, “VDI (VirtualBox Disk Image)”, should work fine for most users. Click on the “Next” button to proceed.
Next, you’ll need to choose the storage on physical hard disk. The default option, “Dynamically allocated”, is recommended as it allows the virtual hard disk to grow as needed. Click on the “Next” button to continue.
Finally, you’ll need to specify the size of the virtual hard disk. The default size of 10GB should be sufficient for a basic Ubuntu installation, but you can increase or decrease the size as needed. Once you’ve chosen the size, click on the “Create” button to create the virtual hard disk.
With the virtual machine created, you’re now ready to proceed with the installation of Ubuntu on VirtualBox. The next step will be to configure the virtual machine settings and attach the Ubuntu ISO file for installation.
Configuring Virtual Machine Settings
Before you can install Ubuntu on your Mac using VirtualBox, you need to configure the virtual machine settings. Here’s how:
Step 1: Open VirtualBox on your Mac.
Step 2: Click on “New” to create a new virtual machine.
Step 3: In the “Name” field, enter a name for your virtual machine, such as “Ubuntu”.
Step 4: In the “Type” field, select “Linux”.
Step 5: In the “Version” field, select “Ubuntu (64-bit)” if you are installing a 64-bit version of Ubuntu, or “Ubuntu (32-bit)” if you are installing a 32-bit version.
Step 6: Click “Next” to continue.
Step 7: In the “Memory size” field, enter the amount of RAM you want to allocate to the virtual machine. It is recommended to allocate at least 2GB of RAM for a smooth experience.
Step 8: Click “Next” to continue.
Step 9: In the “Hard disk” section, select “Create a virtual hard disk now” and click “Create”.
Step 10: Choose the type of virtual hard disk you want to create. Select “VDI (VirtualBox Disk Image)” and click “Next”.
Step 11: Select “Dynamically allocated” for the storage on physical hard disk and click “Next”.
Step 12: Specify the size of the virtual hard disk. It is recommended to allocate at least 20GB of disk space for Ubuntu.
Step 13: Click “Create” to create the virtual hard disk.
Step 14: Once the virtual machine is created, select it from the left sidebar and click on “Settings”.
Step 15: In the “Storage” tab, click on the empty disk icon under “Controller: IDE” and select “Choose/Create a Disk Image”.
Step 16: Navigate to the location where you downloaded the Ubuntu ISO file, select it, and click “Open”.
Step 17: Click “OK” to save the settings.
Now that you have configured the virtual machine settings, you are ready to install Ubuntu on your Mac using VirtualBox.