If you’re a Minecraft enthusiast, you’ve probably heard about mods. Mods are modifications to the game that can enhance your gaming experience by adding new features, items, or even completely changing the gameplay. Installing mods may seem like a daunting task, but fear not! In this step-by-step guide, we will show you how to install mods in Minecraft.
Step 1: Choose your mods
The first step in installing mods is to choose the ones you want to add to your game. There are thousands of mods available, ranging from simple cosmetic changes to complex gameplay overhauls. You can find mods on various websites and forums dedicated to Minecraft modding. Make sure to read the descriptions and reviews to ensure compatibility with your version of Minecraft.
Step 2: Download and install Forge
Before you can install mods, you need to have Forge installed. Forge is a modding platform that acts as a bridge between Minecraft and the mods you want to use. To download Forge, visit the official Forge website and choose the version that matches your Minecraft version. Once downloaded, run the installer and follow the on-screen instructions to install Forge.
Step 3: Locate your Minecraft folder
Next, you need to locate your Minecraft folder. The location of this folder depends on your operating system. On Windows, you can find it by pressing the Windows key + R, typing “%appdata%” (without quotes), and pressing Enter. On Mac, open Finder, press Command + Shift + G, and type “~/Library/Application Support/minecraft” (without quotes) in the Go to Folder dialog. On Linux, the folder is usually located at “~/.minecraft”.
Step 4: Install the mods
Once you’ve located your Minecraft folder, open it and find the “mods” folder. If it doesn’t exist, create a new folder and name it “mods”. Now, simply drag and drop the downloaded mods into the “mods” folder. Make sure to only install mods that are compatible with your version of Minecraft and Forge. Once the mods are in the folder, launch Minecraft and enjoy your newly installed mods!
Remember to always back up your Minecraft saves and mods folder before installing new mods, as some mods may not be compatible with each other and can cause crashes or other issues. Happy modding!
Preparing Your Minecraft Game

Before you can start installing mods, you need to make sure that your Minecraft game is ready. Here’s how to prepare your Minecraft game:
- Make sure you have the latest version of Minecraft installed on your computer. Mods are typically designed to work with specific versions of Minecraft, so it’s important to have the correct version.
- Backup your Minecraft game files. Installing mods can sometimes cause issues, so it’s always a good idea to create a backup of your game files before making any changes.
- Check if you have the correct mod loader installed. Mod loaders are programs that allow you to easily install and manage mods in Minecraft. There are different mod loaders available, such as Forge or Fabric, so make sure you have the one that is compatible with the mods you want to install.
- Research the mods you want to install. Not all mods are compatible with each other, so it’s important to do some research and make sure the mods you want to install will work together. You can find information about compatibility on the mod’s download page or on modding forums.
- Download the mods you want to install. Mods are typically downloaded as .jar or .zip files. Make sure to download them from trusted sources to avoid any potential security risks.
Once you have prepared your Minecraft game, you are ready to start installing mods. The next step is to learn how to install mods in Minecraft.
Backup Your Minecraft Game
Before you start installing mods, it’s always a good idea to backup your Minecraft game. This way, if anything goes wrong during the installation process, you can easily restore your game to its original state.
To backup your Minecraft game, follow these steps:
- Locate your Minecraft game folder. This is usually found in the “AppData” folder on Windows, or in the “Library” folder on Mac.
- Once you’ve found the Minecraft game folder, make a copy of it and paste it in a different location on your computer. This will create a backup of your game.
- You can rename the backup folder to something like “Minecraft Backup” to easily identify it.
- Now, whenever you want to install mods, you can do so without worrying about losing your original game. If anything goes wrong during the installation process, simply delete the current Minecraft game folder and replace it with your backup folder.
By following these steps, you can ensure that your Minecraft game is always protected and that you can easily revert back to the original version if needed. It’s always better to be safe than sorry when it comes to installing mods!
Update Your Minecraft Game
If you want to install Minecraft mods, it’s important to keep your game updated to the latest version. Here’s how you can update your Minecraft game:
- Launch the Minecraft Launcher.
- Click on the “Installations” tab.
- Select the Minecraft version you want to update to.
- Click on the “New” button to create a new installation.
- Enter a name for the new installation.
- Choose the game directory where you want to install the updated version.
- Click on the “Create” button to create the new installation.
- Once the installation is created, click on the “Play” button to launch the updated version of Minecraft.
By following these steps, you will be able to update your Minecraft game to the desired version. This will ensure that you have the latest features and bug fixes, allowing you to enjoy the best Minecraft experience possible.
Install Minecraft Forge
To install mods in Minecraft, you first need to install Minecraft Forge. Minecraft Forge is a modding platform that allows you to easily add and manage mods in your Minecraft game.
Here is a step-by-step guide on how to install Minecraft Forge:
- Visit the official Minecraft Forge website.
- Download the latest version of Minecraft Forge that is compatible with your Minecraft version.
- Once the download is complete, locate the downloaded file on your computer.
- Double-click on the downloaded file to open the installer.
- Follow the on-screen instructions to install Minecraft Forge. Make sure to select the correct Minecraft installation directory.
- After the installation is complete, open the Minecraft launcher.
- In the launcher, click on the “Installations” tab.
- Create a new installation profile by clicking on the “New” button.
- In the new installation profile, select the Minecraft version that is compatible with the installed Minecraft Forge.
- Save the new installation profile.
- Select the newly created installation profile and click on the “Play” button to launch Minecraft with Minecraft Forge installed.
Once Minecraft Forge is installed, you can now start installing mods by simply placing the mod files into the “mods” folder in your Minecraft installation directory. Make sure to only download mods from trusted sources to ensure their compatibility and safety.
Now you know how to install Minecraft Forge and start adding mods to your Minecraft game. Have fun exploring the endless possibilities that mods can bring to your Minecraft experience!
Finding and Downloading Mods
One of the most exciting aspects of Minecraft is the ability to customize your gameplay experience with mods. Mods are modifications made by players that can add new features, change the game’s mechanics, or enhance the graphics. Finding and downloading mods is a straightforward process that can greatly enhance your Minecraft experience.
There are several ways to find and download mods for Minecraft. One of the most popular methods is to visit modding websites or forums dedicated to Minecraft. These websites often have a wide selection of mods available for download, organized by category or popularity. Some popular modding websites include CurseForge, Planet Minecraft, and Minecraft Forum.
When browsing for mods, it’s important to read the descriptions and reviews to ensure that the mod is compatible with your version of Minecraft and doesn’t conflict with any other mods you may have installed. It’s also a good idea to check the comments section for any known issues or troubleshooting tips.
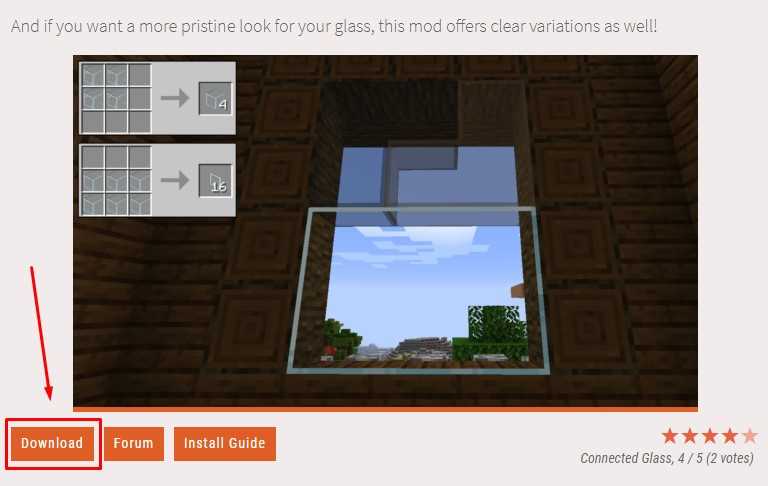
Once you’ve found a mod you want to download, simply click on the download button or link provided. The mod will typically be downloaded as a .jar or .zip file. Make sure to save the file to a location on your computer where you can easily find it.
After downloading the mod, you’ll need to install it into your Minecraft game. The specific installation process can vary depending on the mod and your operating system, but it usually involves placing the mod file into the game’s “mods” folder. To access this folder, you’ll need to locate your Minecraft installation directory, which can usually be found in the “AppData” or “Library” folders on your computer.
Once you’ve located the “mods” folder, simply drag and drop the mod file into it. Make sure to close and reopen Minecraft to ensure that the mod is properly installed. You can then launch the game and enjoy the new features or changes that the mod has added.
Remember to always download mods from trusted sources to ensure their safety and compatibility. It’s also a good idea to regularly check for updates to your mods, as new versions may fix bugs or add new features.
With the right mods, Minecraft can become an entirely new game. So go ahead and start exploring the vast world of Minecraft mods to enhance your gameplay and make your Minecraft experience even more enjoyable!
Research and Choose Mods
Before you can install mods for Minecraft, you need to research and choose which mods you want to install. There are thousands of mods available, each offering different features and gameplay enhancements. Here are some steps to help you research and choose the right mods for your Minecraft experience:
|
1. Determine what you want to add or change in Minecraft. Do you want to add new creatures, improve graphics, or enhance gameplay mechanics? Knowing what you want will help you narrow down your search for mods. |
|
2. Use reliable sources to find mods. Websites like CurseForge, Planet Minecraft, and Minecraft Forum are popular platforms where you can find a wide range of mods. These websites often have user reviews and ratings to help you make an informed decision. |
|
3. Read mod descriptions and reviews. Take the time to read the mod descriptions to understand what each mod offers. Pay attention to compatibility with your Minecraft version and other mods you may already have installed. User reviews can provide valuable insights into the mod’s quality and performance. |
|
4. Consider the mod’s popularity and update frequency. Mods that are popular and frequently updated are more likely to be reliable and compatible with the latest version of Minecraft. Look for mods that have active communities and dedicated developers. |
|
5. Check for mod dependencies. Some mods require other mods or libraries to function properly. Make sure you check if the mod you want to install has any dependencies and install them accordingly. |
By following these steps, you can research and choose mods that will enhance your Minecraft experience and ensure a smooth installation process.
Find Trusted Mod Websites

When it comes to installing mods for Minecraft, it is important to find trusted websites that provide reliable and safe downloads. Here are some steps on how to find trusted mod websites:
1. Research: Start by doing some research on popular Minecraft mod websites. Look for websites that have a good reputation among the Minecraft community.
2. User Reviews: Read user reviews and feedback about the website. This will give you an idea of the website’s reliability and the quality of the mods they offer.
3. Official Forums: Check the official Minecraft forums for recommendations on trusted mod websites. The Minecraft community is a great resource for finding reliable sources for mods.
4. Virus Scans: Before downloading any mods, make sure to run a virus scan on the website and the mod files. This will help ensure that the files are safe and free from any malware.
5. Trusted Sources: Stick to well-known and trusted sources for Minecraft mods. Websites like CurseForge, Planet Minecraft, and Minecraft Forum are popular and trusted sources for mods.
By following these steps, you can find trusted mod websites that provide safe and reliable downloads for your Minecraft mods.
Download Mods
Once you have decided which mods you want to install for your Minecraft game, it’s time to download them. Here’s how to do it:
1. Open your preferred web browser and search for “Minecraft mods”. You will find various websites that offer mods for Minecraft.
2. Choose a reliable website that has a good reputation for providing safe and virus-free mods. It’s important to download mods from trusted sources to ensure the security of your computer.
3. Browse through the available mods and find the ones that you want to download. Make sure to read the descriptions and reviews to get an idea of what each mod does and if it’s compatible with your version of Minecraft.
4. Once you have found a mod that you want to download, click on the download button or link provided. The mod file will usually be in a .jar or .zip format.
5. Choose a location on your computer where you want to save the mod file. It’s recommended to create a separate folder for your Minecraft mods to keep them organized.
6. Wait for the download to complete. The time it takes will depend on the size of the mod file and your internet connection speed.
7. After the download is finished, you can proceed to the next step, which is installing the mods into your Minecraft game.
Remember to only download mods from trusted sources and always scan the files for viruses before installing them. Enjoy exploring the world of Minecraft with your new mods!
Installing Mods
One of the great things about Minecraft is the ability to customize your gameplay experience by installing mods. Mods are modifications to the game that can add new features, change the way the game looks, or enhance gameplay in various ways. Installing mods in Minecraft is a straightforward process that can be done in just a few steps.
Before you begin, make sure you have the latest version of Minecraft installed on your computer. You will also need to download the mod you want to install. Mods can be found on various websites and forums dedicated to Minecraft modding.
Once you have downloaded the mod, follow these steps to install it:
| Step 1: | Locate your Minecraft installation folder. This is usually found in the “AppData” folder on Windows or in the “Library” folder on Mac. |
| Step 2: | Open the “mods” folder in your Minecraft installation folder. If the folder does not exist, create it. |
| Step 3: | Copy the downloaded mod file into the “mods” folder. |
| Step 4: | Launch Minecraft and select the “Forge” profile from the launcher. If you don’t have Forge installed, you will need to install it first. |
| Step 5: | Once Minecraft has launched, you should see the mod you installed in the mods menu. Select the mod and click “Play” to start the game with the mod enabled. |
That’s it! You have successfully installed a mod in Minecraft. Keep in mind that some mods may require additional steps or dependencies to work properly. Always read the mod’s documentation for specific installation instructions.
Now you can enjoy the new features and enhancements that the mod brings to your Minecraft gameplay. Have fun exploring the endless possibilities that mods can offer!