GitHub is a popular platform for hosting and collaborating on software projects. One of the key features of GitHub is the ability to install and use apps that enhance the functionality of the platform. In this step-by-step guide, we will walk you through the process of installing GitHub apps.
Step 1: Sign in to your GitHub account
The first step to installing GitHub apps is to sign in to your GitHub account. If you don’t have an account, you can easily create one by visiting the GitHub website and following the sign-up process. Once you are signed in, you will have access to all the features and functionality of GitHub.
Step 2: Navigate to the GitHub Marketplace
Once you are signed in to your GitHub account, navigate to the GitHub Marketplace. The GitHub Marketplace is a curated collection of apps that can be installed and used with GitHub. You can find the Marketplace by clicking on the “Marketplace” tab in the top navigation bar of the GitHub website.
Step 3: Browse and choose an app
In the GitHub Marketplace, you will find a wide variety of apps that can be installed. These apps range from project management tools to code quality analyzers and everything in between. Take some time to browse through the available apps and choose one that meets your needs.
Step 4: Install the app
Once you have chosen an app, click on its listing to view more details. On the app’s page, you will find information about its features, pricing, and installation instructions. To install the app, simply click on the “Install” button and follow the prompts. GitHub will guide you through the installation process, which may include granting permissions and authorizing access to your GitHub account.
Step 5: Start using the app
After the installation is complete, you can start using the app with your GitHub projects. Depending on the app, you may need to configure it or set it up before you can fully utilize its features. Refer to the app’s documentation or support resources for guidance on how to get started.
That’s it! You have successfully installed a GitHub app and are ready to take advantage of its features. Remember, you can install multiple apps to further enhance your GitHub experience. Explore the GitHub Marketplace and discover the apps that can help you streamline your workflow and improve your productivity.
Section 1: Preparing for Installation

Before you can install a GitHub app, there are a few steps you need to take to ensure a smooth installation process. Follow the steps below to prepare for the installation:
| Step 1: | Sign up for a GitHub account if you don’t already have one. You will need an account to install and use GitHub apps. |
| Step 2: | Make sure you have the necessary permissions to install apps on the repository or organization where you want to install the GitHub app. If you don’t have the required permissions, reach out to the repository or organization owner to request access. |
| Step 3: | Review the documentation and requirements of the GitHub app you want to install. Each app may have specific prerequisites or compatibility requirements that you need to meet. |
| Step 4: | Ensure that you have the appropriate access token or credentials required to install the GitHub app. Some apps may require additional authentication or authorization steps. |
By completing these preparatory steps, you will be ready to proceed with the installation of the GitHub app. Following these steps will help ensure a successful installation process and enable you to take full advantage of the app’s features and functionalities.
Create a GitHub Account

In order to install GitHub apps, you will need to have a GitHub account. If you don’t have one yet, don’t worry! Creating a GitHub account is quick and easy.
To create a GitHub account, follow these steps:
- Go to the GitHub website at github.com.
- Click on the “Sign up” button.
- Fill out the required information, including your desired username, email address, and password.
- Read and accept the GitHub Terms of Service and Privacy Policy.
- Complete the verification process, if prompted.
- Once your account is created, you can start using GitHub and installing apps!
Having a GitHub account allows you to collaborate with others, contribute to open-source projects, and take advantage of the many features and benefits that GitHub has to offer. So go ahead and create your GitHub account today!
Generate a Personal Access Token
In order to install GitHub apps, you will need to generate a personal access token. This token will allow the app to access your GitHub account and perform actions on your behalf.
To generate a personal access token, follow these steps:
- Go to the GitHub website and log in to your account.
- Click on your profile picture in the top right corner of the screen and select “Settings” from the dropdown menu.
- In the left sidebar, click on “Developer settings”.
- Click on “Personal access tokens”.
- Click on the “Generate new token” button.
- Give your token a descriptive name in the “Note” field.
- Choose the scopes that the token should have access to. These scopes determine what actions the app can perform on your behalf.
- Click on the “Generate token” button.
- Copy the generated token and store it in a safe place. This token will not be shown again, so make sure to copy it before leaving the page.
Once you have generated a personal access token, you can use it to install GitHub apps and grant them the necessary permissions to access your account.
Install Git on Your Local Machine
In order to use GitHub apps, you need to have Git installed on your local machine. Git is a version control system that allows you to track changes in your code and collaborate with others.
Here is a step-by-step guide on how to install Git:
| Step 1: | Go to the official Git website at https://git-scm.com/downloads. |
| Step 2: | Choose the appropriate version of Git for your operating system (Windows, Mac, or Linux) and click on the download link. |
| Step 3: | Once the download is complete, run the installer and follow the on-screen instructions to install Git. |
| Step 4: | During the installation process, you can choose the components to install and the installation directory. The default options are usually sufficient for most users. |
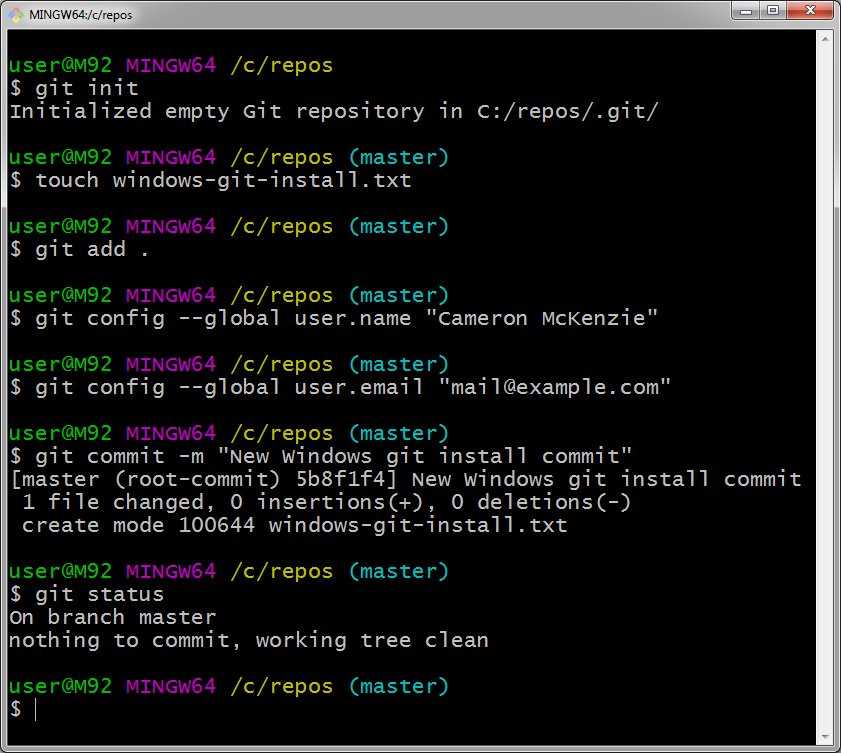
| Step 5: | After the installation is complete, open a command prompt or terminal window and type git --version to verify that Git has been installed successfully. |
Once Git is installed on your local machine, you can proceed with installing GitHub apps and start using them to collaborate on your projects.
Section 2: Installing GitHub Apps
Installing GitHub apps is a straightforward process that allows you to enhance your GitHub experience. These apps provide additional functionality and features to help you streamline your workflow and collaborate more effectively with others.
To install GitHub apps, follow these steps:
- Go to the GitHub Apps Marketplace.
- Browse through the available apps or use the search bar to find a specific app.
- Click on the app you want to install to view more details.
- Review the app’s description, features, and any requirements or limitations.
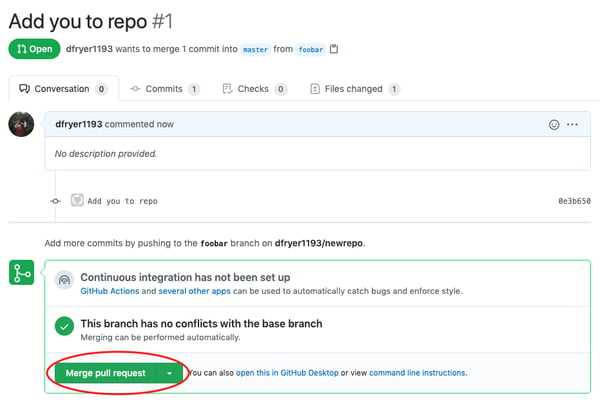
- If the app meets your needs, click on the “Install” button.
- Choose the repositories or organizations you want to grant access to the app.
- Review the requested permissions and click on the “Install” button again.
- Authorize the app to access your GitHub account by signing in with your credentials.
- Once installed, the app will be available in your GitHub account and you can start using its features.
It’s important to note that some apps may require additional configuration or setup after installation. Make sure to follow any instructions provided by the app developer to ensure proper functionality.
By installing GitHub apps, you can customize your GitHub experience and take advantage of powerful tools and integrations to improve your productivity and collaboration.