
If you are a Mac user and find yourself needing to delete Word documents, you may be wondering how to go about it. Deleting documents on a Mac is a simple process, but it’s important to know the steps to ensure you don’t accidentally delete the wrong file. In this step-by-step guide, we will walk you through the process of deleting Word documents on your Mac.
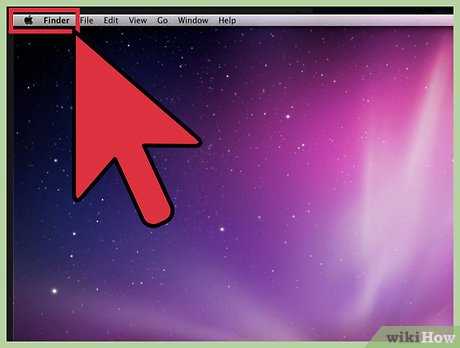
Step 1: Locate the Word documents you want to delete. You can find them by opening the Finder application and navigating to the folder where the documents are stored. If you are unsure of the location, you can use the search function in Finder to locate the files.
Step 2: Once you have located the Word documents you want to delete, select them by clicking on them. You can select multiple documents by holding down the Command key while clicking on each document. This will highlight the selected documents.
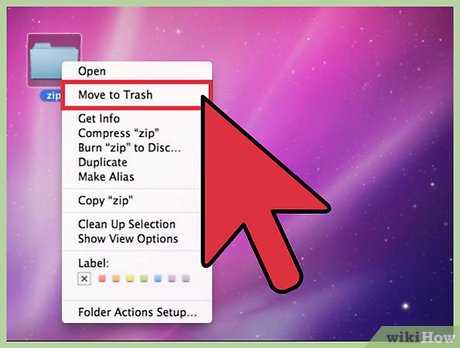
Step 3: With the documents selected, right-click on one of the highlighted documents and a drop-down menu will appear. From the menu, select the “Move to Trash” option. Alternatively, you can press the Command key and the Delete key on your keyboard to move the selected documents to the Trash.
Step 4: After moving the documents to the Trash, you can empty the Trash to permanently delete the Word documents from your Mac. To do this, right-click on the Trash icon in the Dock and select “Empty Trash” from the menu. A confirmation dialog will appear, asking if you are sure you want to permanently delete the items. Click “Empty Trash” to confirm.
By following these simple steps, you can easily delete Word documents on your Mac. Remember to double-check the documents you are deleting to avoid accidentally deleting important files. Keeping your files organized and regularly deleting unnecessary documents can help free up space on your Mac and keep it running smoothly.
Preparing to Delete Word Documents
Before you delete Word documents on your Mac, it’s important to take a few steps to ensure that you don’t accidentally delete any important files. Follow these steps to properly prepare for deleting Word documents:
1. Back up your files: Before deleting any Word documents, it’s always a good idea to create a backup of your files. This way, if you accidentally delete something important, you can easily restore it from the backup.
2. Review your documents: Take some time to review the Word documents you want to delete. Make sure you don’t need any of the information or content stored in these documents. If there are any important details or data, consider saving them elsewhere before deleting the documents.
3. Empty the trash: Once you delete Word documents on your Mac, they are moved to the trash. However, they still take up space on your hard drive until you empty the trash. Before deleting any Word documents, make sure to empty the trash to free up space on your Mac.
4. Close any open Word documents: Before deleting Word documents, make sure to close any open documents in Microsoft Word. This ensures that you don’t accidentally delete a document that is currently being edited or worked on.
5. Double-check your selection: Before confirming the deletion of Word documents, double-check your selection. Make sure you have selected the correct documents and that you are not deleting anything by mistake.
By following these steps, you can properly prepare to delete Word documents on your Mac without the risk of losing any important files or data.
Locate the Word Documents
Before you can delete Word documents on your Mac, you need to locate them. Here’s how you can find the Word documents:
| Step | Description |
|---|---|
| 1 | Open the Finder application on your Mac. |
| 2 | Click on “Documents” in the sidebar. |
| 3 | Look for the “Microsoft User Data” folder and open it. |
| 4 | Within the “Microsoft User Data” folder, you will find the “Office 2011 AutoRecovery” or “Office 2016 AutoRecovery” folder. |
| 5 | Open the “AutoRecovery” folder to locate the Word documents that are currently open or have been recently closed. |
| 6 | If you want to delete Word documents that are saved in other locations, you can use the Finder’s search function to locate them. Simply click on the magnifying glass icon in the top-right corner of the Finder window and enter the name of the Word document you want to delete. |
Once you have located the Word documents, you can proceed to delete them following the steps outlined in the previous sections.
Back up Important Documents
Before you delete any Word documents on your Mac, it’s always a good idea to back them up. Backing up your important documents ensures that you have a copy of them in case anything goes wrong during the deletion process.
To back up your Word documents on Mac, you can use various methods. One option is to manually copy and paste the files to an external storage device, such as a USB flash drive or an external hard drive. Simply locate the Word documents you want to back up, right-click on them, and select “Copy.” Then, navigate to your external storage device, right-click, and select “Paste.”
Another option is to use cloud storage services like iCloud, Google Drive, or Dropbox. These services allow you to upload your Word documents to the cloud, where they will be securely stored and accessible from any device with an internet connection. Simply sign up for an account, install the corresponding app on your Mac, and follow the instructions to upload your documents.
Regardless of the method you choose, make sure to organize your backed-up documents in a way that makes them easy to find and retrieve. Consider creating folders or using descriptive file names to help you stay organized.
By backing up your important Word documents on Mac, you can have peace of mind knowing that your files are safe and easily recoverable, even if you accidentally delete them.
Empty the Trash Bin
Once you have deleted the Word documents on your Mac, they are moved to the Trash Bin. However, deleting them from the Trash Bin is necessary to completely remove them from your computer.
To empty the Trash Bin on your Mac, follow these steps:
- Click on the Trash Bin icon located on your Dock. This will open a window showing all the deleted documents.
- Review the documents in the Trash Bin to ensure that you want to permanently delete them. If there are any documents you want to keep, you can drag them out of the Trash Bin and back to their original location.
- Once you have confirmed that you want to delete all the documents in the Trash Bin, right-click on the Trash Bin icon and select “Empty Trash” from the context menu. Alternatively, you can also click on the “Empty” button located at the top-right corner of the Trash Bin window.
- A confirmation dialog will appear asking if you are sure you want to permanently delete the documents. Click on the “Empty Trash” button to proceed.
- Your Mac will then delete all the documents in the Trash Bin, freeing up the disk space they were occupying.
By following these steps, you can ensure that the deleted Word documents are completely removed from your Mac.
Deleting Word Documents
If you want to delete Word documents on your Mac, there are a few simple steps you can follow. Whether you want to clear up space on your computer or remove unnecessary files, deleting Word documents is a straightforward process.
Here’s how you can delete Word documents:
- Open the Finder application on your Mac.
- Navigate to the folder where the Word documents are stored.
- Select the Word documents you want to delete by clicking on them.
- Right-click on the selected Word documents and choose “Move to Trash” from the drop-down menu.
- Alternatively, you can also press the “Command” key and the “Delete” key on your keyboard to move the selected Word documents to the Trash.
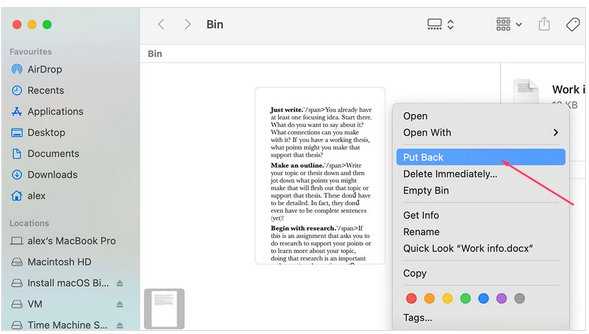
- To permanently delete the Word documents, open the Trash folder.
- Right-click on the Word documents in the Trash and choose “Delete Immediately” from the drop-down menu.
- Confirm the deletion by clicking on “Delete” in the pop-up window.
By following these steps, you can easily delete Word documents from your Mac and free up storage space. Just make sure to double-check the documents you are deleting to avoid accidentally removing important files.
Select the Documents to Delete
Before you can delete Word documents on your Mac, you need to select the specific documents that you want to delete. Here’s how you can do it:
- Open the Finder application on your Mac.
- Navigate to the folder where your Word documents are stored. This could be the Documents folder or any other folder where you have saved your documents.
- Once you are in the folder, you will see a list of all the documents present in that folder.
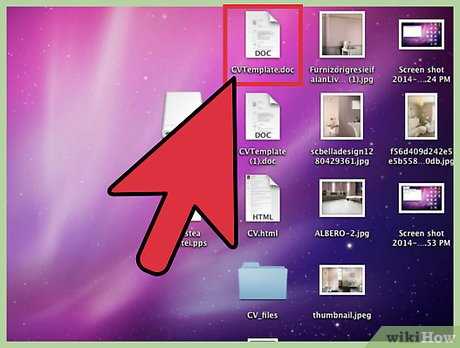
- Scroll through the list and identify the Word documents that you want to delete.
- To select a single document, simply click on it once. The selected document will be highlighted.
- If you want to select multiple documents, hold down the Command key on your keyboard and click on each document that you want to delete. Each selected document will be highlighted.
- If you want to select a range of documents, click on the first document in the range, hold down the Shift key on your keyboard, and then click on the last document in the range. All the documents between the first and last document will be selected.
Once you have selected the documents that you want to delete, you can proceed to the next step and delete them from your Mac.
Move Documents to Trash
To delete Word documents on your Mac, you can simply move them to the Trash. Here’s how:
| 1. | Open the Finder application on your Mac. |
| 2. | Navigate to the folder where the Word documents you want to delete are located. |
| 3. | Select the Word documents you want to delete by clicking on them while holding down the Command key. |
| 4. | Right-click on one of the selected documents and choose “Move to Trash” from the context menu. |
| 5. | Alternatively, you can also drag and drop the selected documents to the Trash icon in the Dock. |
| 6. | Once the documents are in the Trash, you can either leave them there until you empty the Trash, or you can permanently delete them by right-clicking on the Trash icon and selecting “Empty Trash”. |
By following these steps, you can easily delete Word documents on your Mac and free up storage space.
Permanently Delete Documents
If you want to permanently delete Word documents on your Mac, follow these steps:
- Empty the Trash: First, make sure to empty the Trash on your Mac. Deleted documents are initially moved to the Trash, and emptying it will permanently remove them from your system.
- Secure Empty Trash: To ensure that the deleted Word documents cannot be recovered, you can use the Secure Empty Trash option. This overwrites the deleted files with random data, making them virtually impossible to retrieve.
- Use File Shredder Software: If you want an extra layer of security, you can consider using file shredder software. These applications specialize in permanently deleting files and ensuring that they cannot be recovered. Simply drag and drop the Word documents into the file shredder software, and it will take care of the rest.
By following these steps, you can confidently delete Word documents on your Mac, knowing that they are permanently removed from your system.


