Welcome to our tutorial on how to install Linux Mint, a popular operating system known for its user-friendly interface and stability. Whether you’re a beginner or an experienced user, this step-by-step guide will walk you through the process of installing Linux Mint on your computer.
Linux Mint is a free and open-source operating system based on the Linux kernel. It offers a wide range of software and applications, making it a great choice for both personal and professional use. In this tutorial, we will show you how to download the latest version of Linux Mint and install it on your computer.
Before we begin, it’s important to note that installing Linux Mint will erase all data on your computer, so it’s essential to back up any important files or documents. Once you’re ready, let’s dive into the installation process and get started with Linux Mint!
Preparing for Installation
Before you can install Linux Mint on your system, you need to download the necessary files. Here’s how:
- Go to the official Linux Mint website.
- Click on the “Download” section.
- Choose the edition of Linux Mint you want to install (Cinnamon, MATE, Xfce, or KDE).
- Select the appropriate version (32-bit or 64-bit) based on your system.
- Click on the download link to start the download.
Once you have downloaded the Linux Mint ISO file, you are ready to proceed with the installation. This tutorial will guide you through the step-by-step process of installing Linux Mint on your system.
Checking System Requirements
Before you begin the installation process, it is important to check if your system meets the minimum requirements to run Linux Mint smoothly. Here are the steps to check the system requirements:
- Make sure your computer meets the minimum hardware specifications for Linux Mint. These include a minimum of 2GB RAM, 20GB of free disk space, and a 1GHz processor.
- Ensure that your computer is compatible with the Linux Mint operating system. Linux Mint supports a wide range of hardware, but it’s always a good idea to check the compatibility list on the official Linux Mint website.
- Download the Linux Mint ISO file from the official website. Choose the appropriate version based on your system architecture (32-bit or 64-bit).
- Verify the integrity of the downloaded ISO file using the MD5 or SHA256 checksum provided on the website. This ensures that the file was downloaded correctly and is not corrupted.
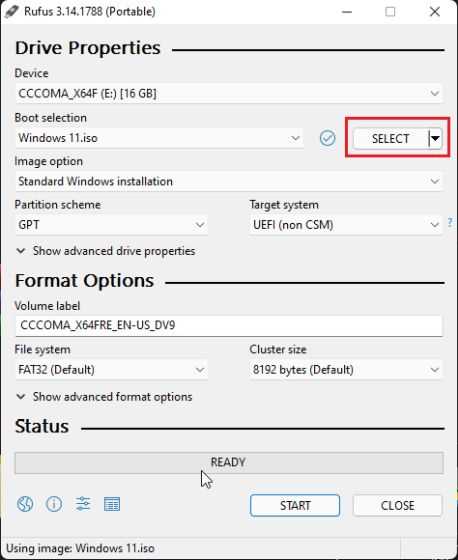
- Prepare a bootable USB drive or DVD using the downloaded ISO file. You can use tools like Rufus or Etcher to create a bootable USB drive.
By following these steps, you can ensure that your system is ready for the Linux Mint installation process. Once you have checked the system requirements and prepared the bootable media, you can proceed with the installation tutorial.
Downloading Linux Mint
Before you can install Linux Mint on your computer, you need to download the operating system. This tutorial will guide you through the process of downloading Linux Mint.
To download Linux Mint, follow these steps:
| Step 1: | Go to the official Linux Mint website. |
| Step 2: | Click on the “Download” button. |
| Step 3: | Select the edition of Linux Mint you want to download. There are different editions available, such as Cinnamon, MATE, and Xfce. |
| Step 4: | Choose the version of Linux Mint you want to download. The latest version is recommended for most users. |
| Step 5: | Click on the “Download” button to start the download. |
Once the download is complete, you can proceed to the next step of the installation process. In the next tutorial, we will show you how to install Linux Mint on your system.
Creating a Bootable USB Drive
To install Linux Mint, you will need to create a bootable USB drive. This tutorial will guide you through the process step-by-step.
Before you begin, make sure you have a USB drive with at least 4GB of storage capacity. Also, ensure that you have downloaded the Linux Mint ISO file from the official website.
Follow these steps to create a bootable USB drive:
| Step 1: | Insert the USB drive into your computer. |
| Step 2: | Open the “Start” menu and search for “Disk Utility”. |
| Step 3: | Launch the Disk Utility application. |
| Step 4: | Select your USB drive from the list of available drives. |
| Step 5: | Click on the “Erase” button to format the USB drive. |
| Step 6: | Choose a name for the USB drive and select the “FAT32” file system. |
| Step 7: | Click on the “Erase” button to format the USB drive. |
| Step 8: | Once the formatting is complete, close the Disk Utility application. |
| Step 9: | Open the “Terminal” application. |
| Step 10: | Run the following command to navigate to the location where you downloaded the Linux Mint ISO file: |
cd /path/to/iso/file |
|
| Step 11: | Run the following command to create a bootable USB drive: |
sudo dd if=linuxmint.iso of=/dev/sdX bs=4M && sync |
|
| Step 12: | Replace /dev/sdX with the device name of your USB drive. Be careful to select the correct device, as this command will erase all data on the specified device. |
| Step 13: | Press Enter to execute the command. |
| Step 14: | Wait for the process to complete. It may take a few minutes. |
| Step 15: | Once the process is finished, you will have a bootable USB drive with Linux Mint. |
Now you are ready to install Linux Mint on your system using the bootable USB drive you created. Follow the installation instructions in the tutorial to complete the installation process.
Installing Linux Mint
Linux Mint is an operating system that is based on the Linux kernel. It is a popular choice for those who want to install a user-friendly and customizable operating system on their computer.
In this tutorial, we will guide you on how to install Linux Mint on your system. Follow the step-by-step instructions below to get started:
Step 1: Download the Linux Mint ISO file from the official website.
Step 2: Create a bootable USB drive using the ISO file. You can use tools like Rufus or Etcher to do this.
Step 3: Insert the bootable USB drive into your computer and restart it.
Step 4: During the boot process, press the key to access the boot menu. This key is usually F12 or Esc, but it may vary depending on your system.
Step 5: From the boot menu, select the USB drive as the boot device.
Step 6: The Linux Mint installer will now load. Follow the on-screen instructions to proceed with the installation.
Step 7: Choose your language, keyboard layout, and other preferences.
Step 8: Select the installation type. You can either install Linux Mint alongside your existing operating system or replace it entirely.
Step 9: Choose the partition where you want to install Linux Mint.
Step 10: Set up your username, password, and other user details.
Step 11: Wait for the installation process to complete.
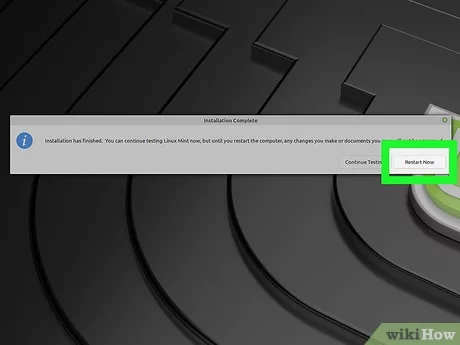
Step 12: Once the installation is finished, restart your computer.
Step 13: Remove the USB drive from your computer.
Step 14: Congratulations! You have successfully installed Linux Mint on your system. Enjoy using your new operating system!
By following this tutorial, you can easily install Linux Mint on your computer and experience the benefits of this powerful and user-friendly operating system.
Booting from the USB Drive
Booting from a USB drive is a crucial step in installing Linux Mint on your system. This tutorial will guide you through the process of creating a bootable USB drive and booting your system from it.
To start, you will need to download the Linux Mint operating system. You can do this by visiting the official Linux Mint website and selecting the version that is compatible with your system. Once you have downloaded the ISO file, you will need to create a bootable USB drive.
There are several tools available that can help you create a bootable USB drive, such as Rufus or Etcher. These tools allow you to easily transfer the ISO file onto the USB drive, making it bootable. Simply follow the instructions provided by the tool of your choice to create the bootable USB drive.
Once you have created the bootable USB drive, you will need to restart your system and access the boot menu. The boot menu can usually be accessed by pressing a specific key during the startup process, such as F12 or Esc. Consult your system’s documentation or do a quick internet search to find out the specific key for your system.
After accessing the boot menu, you will need to select the USB drive as the boot device. Use the arrow keys to navigate through the menu and select the USB drive. Once you have selected the USB drive, press Enter to boot from it.
Your system will now boot from the USB drive and you will be presented with the Linux Mint installation menu. From here, you can follow the on-screen instructions to install Linux Mint on your system. Make sure to carefully read and follow each step of the installation process.
Once the installation is complete, you can remove the USB drive and restart your system. Your system will now boot into the Linux Mint operating system, and you can start exploring all the features and functionalities it has to offer.
Booting from a USB drive is a simple and straightforward process, and it is an essential step in installing Linux Mint on your system. By following this tutorial, you should now have a good understanding of how to boot from a USB drive and install Linux Mint on your system.