If you’re a Mac user and want to easily install and manage packages on your system, you need a reliable command-line package manager. One of the most popular package managers for Mac is Homebrew, also known as Brew. With Brew, you can quickly install and update software packages using simple command-line commands.
Installing Brew on your Mac is a straightforward process that requires just a few simple steps. First, you need to open the Terminal application, which you can find in the Utilities folder within your Applications folder. The Terminal allows you to execute commands directly on your Mac’s command-line interface.
Once you have the Terminal open, you can proceed with the installation of Brew. To install Brew, you need to run a single command in the Terminal. This command will download and install the Brew package manager on your Mac. After the installation is complete, you’ll be able to use the “brew” command to manage software packages on your system.
With Brew installed, you can easily install new software packages by running the “brew install” command followed by the name of the package you want to install. Brew will automatically download and install the package for you, taking care of any dependencies or configuration required. You can also use the “brew update” command to update all installed packages to their latest versions.
In conclusion, if you’re a Mac user looking for a convenient and efficient way to install and manage software packages, Brew is the perfect choice. With its simple command-line interface and extensive package library, Brew makes it easy to keep your Mac up to date with the latest software.
Section 1: Preparing for Installation
Before you can install Homebrew, you need to make sure your Mac is ready for the installation process. Homebrew is a command-line package manager for Mac that allows you to easily install and manage various software packages.
To install Homebrew, you will need to have the command-line tools installed on your Mac. These tools are essential for running the necessary commands to install Homebrew and manage packages using the brew command.
To check if you have the command-line tools installed, open the Terminal application on your Mac. You can find it by searching for “Terminal” in Spotlight or by navigating to Applications -> Utilities -> Terminal.
In the Terminal window, type the following command and press Enter:
xcode-select --version
If you see a version number displayed, it means the command-line tools are already installed on your Mac. If you see an error message or no version number, you will need to install the command-line tools before proceeding with the Homebrew installation.
To install the command-line tools, you can run the following command in the Terminal:
xcode-select --install
This command will prompt you to install the command-line tools. Follow the on-screen instructions to complete the installation process.
Once the command-line tools are installed, you are ready to proceed with the Homebrew installation. In the next section, we will guide you through the steps to install Homebrew on your Mac.
Check System Requirements
Before you can install Homebrew on your Mac, you need to make sure your system meets the necessary requirements. Here are the system requirements for installing and using Homebrew:
| Requirement | Details |
|---|---|
| Operating System | Mac OS X 10.10 or higher |
| Terminal | You will need to use the Terminal application, which can be found in the Utilities folder within the Applications folder. |
| Package Manager | Homebrew is a package manager for Mac, so you will need to have it installed on your system. If you don’t have Homebrew installed, you can install it by running the following command in the Terminal: |
| Command-Line Tools | Homebrew requires the Command-Line Tools for Xcode to be installed. If you don’t have them installed, you can install them by running the following command in the Terminal: |
Once you have checked that your Mac meets the system requirements, you are ready to proceed with the installation of Homebrew.
Update macOS
Before installing Homebrew, it’s important to make sure that your macOS is up to date. Updating your macOS ensures that you have the latest security patches and bug fixes, which is important for a smooth installation and operation of Homebrew.
To update your macOS, follow these steps:
- Open the Terminal application on your Mac. You can find it by searching for “Terminal” in Spotlight or by navigating to Applications > Utilities > Terminal.
- In the Terminal window, type the following command and press Enter:
- Wait for the update process to complete. This may take some time, depending on the size of the updates and your internet connection speed.
- Once the update process is finished, restart your Mac to apply the updates.
softwareupdate --install --allThis command will check for available updates and install them on your Mac.
After updating your macOS, you can proceed with the installation of Homebrew using the command-line package manager, brew.
Install Xcode Command Line Tools
To install Homebrew on your Mac, you will need to have Xcode Command Line Tools installed. These tools provide a set of command-line utilities that are required for Homebrew to work properly.
To install Xcode Command Line Tools, follow these steps:
- Open the Terminal application on your Mac. You can find it by searching for “Terminal” in Spotlight or by navigating to Applications -> Utilities -> Terminal.
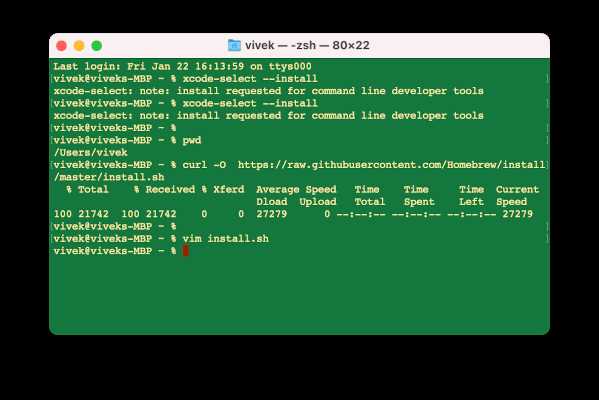
- Type the following command in the Terminal and press Enter:
- A dialog box will appear asking if you want to install the command line developer tools. Click “Install” to proceed.
- Wait for the installation to complete. It may take a few minutes.
- Once the installation is finished, you can verify that Xcode Command Line Tools are installed by typing the following command in the Terminal:
- If the command returns a path, it means that Xcode Command Line Tools are installed and you can proceed with installing Homebrew.
xcode-select --installxcode-select -pBy following these steps, you will have Xcode Command Line Tools installed on your Mac, which is a prerequisite for installing Homebrew. Once you have Xcode Command Line Tools installed, you can proceed to the next step and install Homebrew using the Terminal.
Section 2: Installing Brew

To install Brew on your Mac, you need to use the command-line package manager called Homebrew. Homebrew, often referred to as Brew, allows you to easily install and manage software packages on your Mac.
Follow the steps below to install Brew:
| Step 1: | Open the Terminal application on your Mac. You can find it by searching for “Terminal” in Spotlight or navigating to Applications > Utilities > Terminal. |
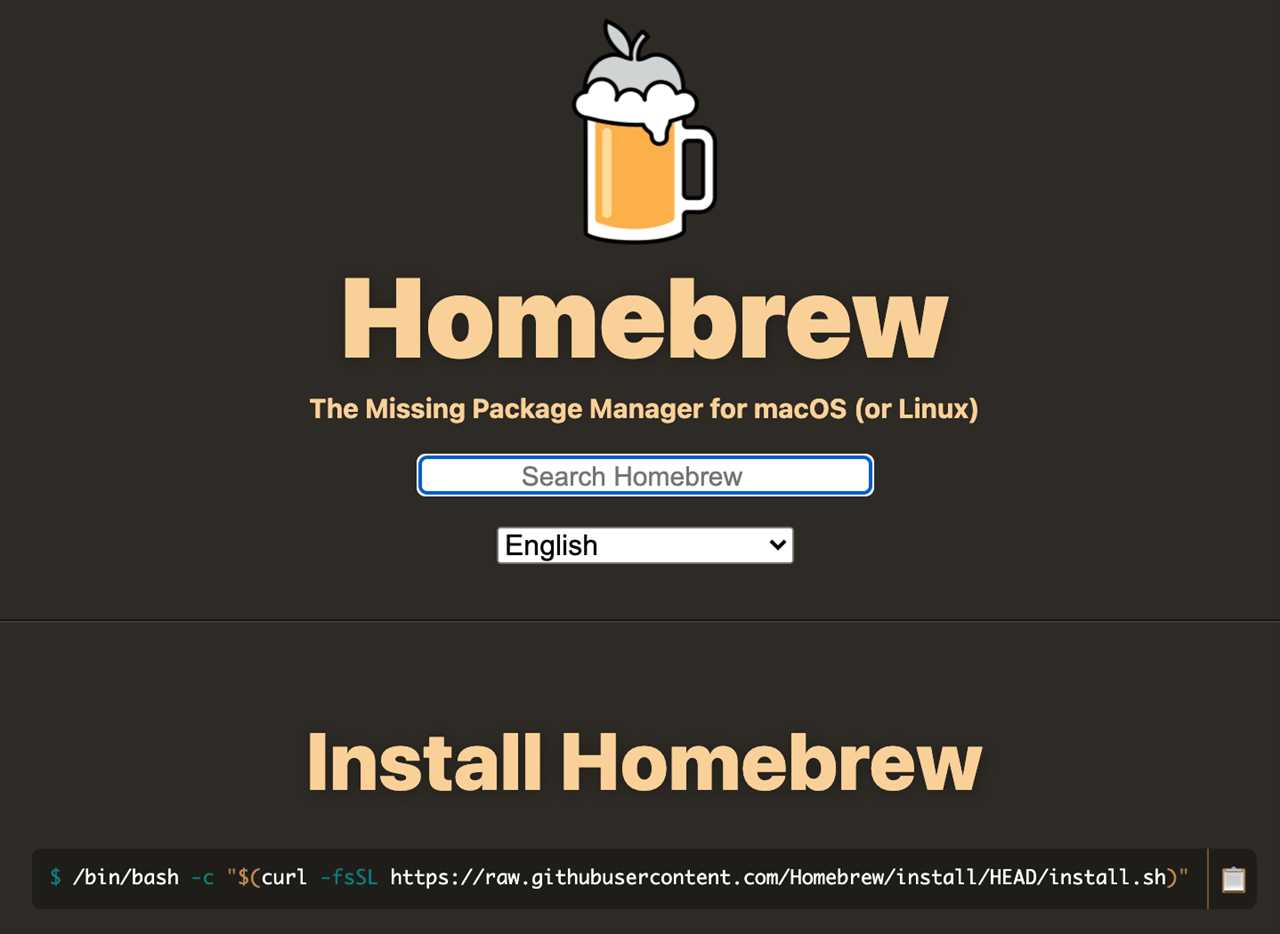
| Step 2: | Once the Terminal is open, paste the following command and press Enter: |
/bin/bash -c "$(curl -fsSL https://raw.githubusercontent.com/Homebrew/install/HEAD/install.sh)" |
|
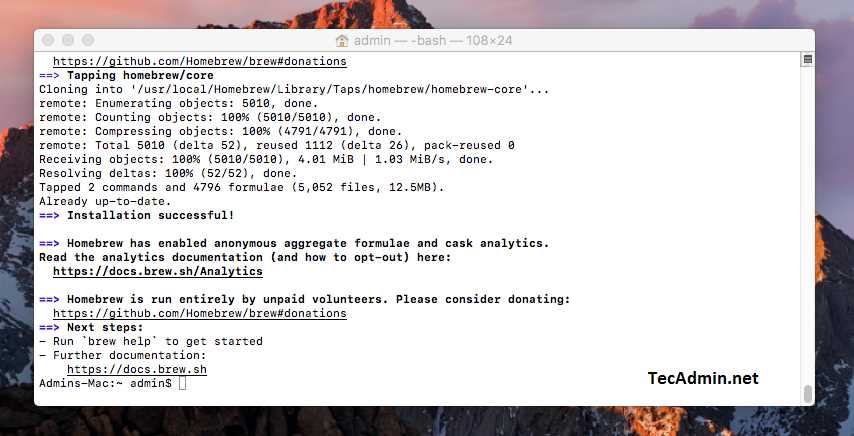
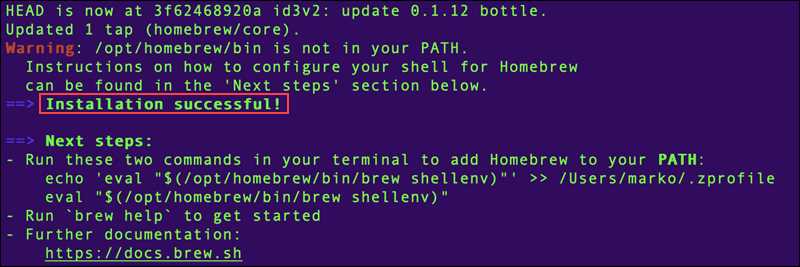
| Step 3: | The command will download and install Homebrew on your Mac. You may be prompted to enter your password during the installation process. |
| Step 4: | Once the installation is complete, you can verify that Brew is installed correctly by typing the following command and pressing Enter: |
brew --version |
|
| Step 5: | If Brew is installed correctly, the command will display the version number of Brew. Congratulations, you have successfully installed Brew on your Mac! |
Now that you have Brew installed, you can use it to install various packages and utilities on your Mac with just a simple command. Enjoy the flexibility and convenience that Brew provides!
Open Terminal
To install Homebrew on your Mac, you need to use the Terminal, which is a command-line interface. The Terminal allows you to interact with your Mac using text commands. It is a powerful tool that can be used to install, manage, and update software packages on your Mac.
To open the Terminal, follow these steps:
- Click on the Spotlight icon in the top-right corner of your screen. It looks like a magnifying glass.
- Type “Terminal” in the search bar and press Enter.
- The Terminal application will open, and you will see a command prompt.
Now that you have the Terminal open, you can proceed to the next step, which is installing Homebrew, the package manager for macOS.