
If you are a Mac user and you are experiencing issues with Microsoft Word, such as crashes or strange behavior, it may be time to reset the application to its default settings. Resetting Word can help resolve many common problems and restore the program to its original state.
Microsoft Word is a powerful word processing application that allows you to create and edit documents with ease. However, over time, the program’s settings can become corrupted or misconfigured, leading to issues that can affect your productivity. Resetting Word to its default settings can help eliminate these problems and ensure that the program is running smoothly.
Resetting Word on a Mac is a straightforward process that can be done in just a few steps. In this step-by-step guide, we will walk you through the process of resetting Word to its default settings, ensuring that you can get back to work without any further issues.
Why Reset Microsoft Word on Mac?

Resetting Microsoft Word on your Mac can be necessary for several reasons. Here are a few reasons why you might want to reset the settings of Microsoft Word to its default state:
- Fixing Issues: Resetting Microsoft Word can help resolve various issues that you may be experiencing, such as crashes, freezing, or slow performance. By resetting the settings, you can eliminate any corrupted or misconfigured preferences that might be causing these problems.
- Removing Customizations: If you have made extensive customizations to Microsoft Word’s settings and want to start fresh with the default settings, resetting can be a quick way to achieve that. This can be useful if you want to undo any changes you made or if you simply prefer the default configuration.
- Improving Compatibility: Resetting Microsoft Word can also help improve compatibility with other applications or systems. If you are experiencing compatibility issues with certain file formats or other software, resetting Word can help ensure smoother interactions.
- Learning and Familiarization: Resetting Microsoft Word to its default settings can be beneficial if you are new to the application or if you are learning how to use it. By starting with the default settings, you can familiarize yourself with the standard features and layout of Word.
Regardless of the reason, resetting Microsoft Word on your Mac is a straightforward process that can be done in just a few steps. By doing so, you can restore the application to its default state and potentially resolve any issues or conflicts you may be encountering.
Benefits of Resetting Microsoft Word on Mac

Resetting Microsoft Word to its default settings on a Mac can bring several benefits to users. Here are some of the advantages of performing a reset:
1. Improved Performance: Over time, Microsoft Word may accumulate temporary files, preferences, and settings that can slow down the application. Resetting Word to its default settings can help eliminate these unnecessary files and improve the overall performance of the program.
2. Fixing Glitches and Errors: If you are experiencing frequent crashes, freezes, or other glitches while using Microsoft Word on your Mac, resetting the application can help resolve these issues. Resetting will remove any corrupted files or settings that may be causing the problems.
3. Restoring Default Layout and Preferences: Resetting Word will revert any customizations you have made to the program’s layout or preferences back to the default settings. This can be useful if you have made changes that you no longer want or if you want to start fresh with the original Word layout.
4. Troubleshooting Compatibility Issues: Sometimes, certain add-ins or extensions can cause compatibility issues with Microsoft Word on a Mac. By resetting Word to its default settings, you can troubleshoot and identify any compatibility problems that may be affecting the application.
5. Simplified Troubleshooting: If you are encountering persistent issues with Word on your Mac and have exhausted other troubleshooting methods, resetting the application can be a last resort. It provides a clean slate for troubleshooting and can help identify whether the problem lies within Word itself or with other factors on your Mac.
In conclusion, resetting Microsoft Word to its default settings on a Mac can offer various benefits, including improved performance, fixing glitches and errors, restoring default layout and preferences, troubleshooting compatibility issues, and simplifying troubleshooting efforts. If you are experiencing issues with Word, resetting the application can be a useful step to resolve them.
Step 1: Close Microsoft Word

Before you can reset Microsoft Word to its default settings on your Mac, you need to make sure that the application is completely closed. This step is crucial to ensure that any changes you make to the settings will take effect.
To close Microsoft Word, follow these simple steps:
- Save your work: If you have any unsaved documents or changes in Microsoft Word, make sure to save them before closing the application. This will prevent any data loss.
- Quit Microsoft Word: Go to the menu bar at the top of your screen and click on the “Word” menu. From the drop-down menu, select the “Quit Word” option. Alternatively, you can use the keyboard shortcut Command + Q to quit the application.
Once you have closed Microsoft Word, you are ready to proceed to the next step and reset the application to its default settings.
Save and Close Any Open Documents
Before resetting Microsoft Word to its default settings on your Mac, it is important to save and close any open documents. This ensures that you don’t lose any unsaved work or changes made to your documents.
To save a document, click on the “File” tab in the top menu bar and select “Save” or use the shortcut Command + S. Make sure to choose a location on your Mac where you want to save the document.
If you have multiple documents open, repeat the saving process for each document.
After saving all your documents, it is recommended to close them before proceeding with the reset. To close a document, click on the “File” tab and select “Close” or use the shortcut Command + W. Repeat this process for each open document.
By saving and closing your open documents, you can ensure that you won’t lose any important work or changes when resetting Microsoft Word to its default settings on your Mac.
Quit Microsoft Word Completely

Before you can reset Microsoft Word to its default settings on your Mac, you need to make sure that the application is completely closed. This is important because if Word is still running in the background, the changes you make to its settings may not take effect.
To quit Microsoft Word completely on your Mac, follow these steps:
- Click on the “Word” menu in the top-left corner of your screen.
- From the drop-down menu, select “Quit Word”.
- If you have any unsaved documents, Word will prompt you to save them. Make sure to save any important work before proceeding.
- Once you have saved your documents, click on “Quit” to exit Word.
After quitting Microsoft Word, you can proceed with resetting its settings to the default values. This will ensure that any changes or customizations you have made to Word will be reverted back to the original settings.
Note: It is important to quit Microsoft Word completely before resetting its settings. If Word is still running in the background, the changes you make may not be applied.
Step 2: Delete Word Preferences
In order to reset Microsoft Word to its default settings on your Mac, you will need to delete the Word preferences. This will remove any customizations or settings that you have made in Word.
To delete the Word preferences, follow these steps:
- Quit Microsoft Word if it is currently open.
- Open a Finder window.
- Click on the “Go” menu at the top of the screen and select “Go to Folder…”
- In the dialog box that appears, type “~/Library/Preferences/” and click “Go”.
- Locate the file named “com.microsoft.Word.plist” and move it to the trash.
- Empty the trash to permanently delete the preferences file.
Once you have deleted the Word preferences, you can reopen Microsoft Word and it will be reset to its default settings. Any customizations or settings that you had previously made will be gone.
Note: Deleting the Word preferences will not delete any of your documents or files. It only resets the settings and preferences of the Word application.
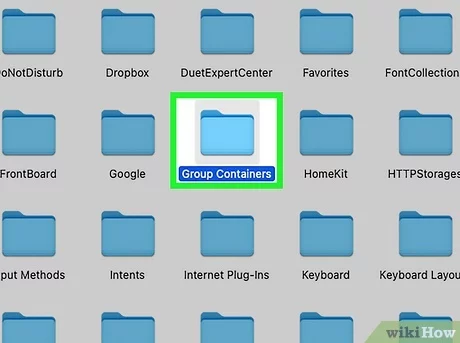
Locate the Preferences Folder

To reset Microsoft Word to its default settings on a Mac, you need to locate the preferences folder. The preferences folder contains all the settings and configurations for Microsoft Word on your Mac.
Here are the steps to locate the preferences folder:
| Step 1 | Open a Finder window on your Mac. |
| Step 2 | Click on the “Go” menu at the top of the screen. |
| Step 3 | Hold down the “Option” key on your keyboard. |
| Step 4 | Click on the “Library” option that appears in the “Go” menu. |
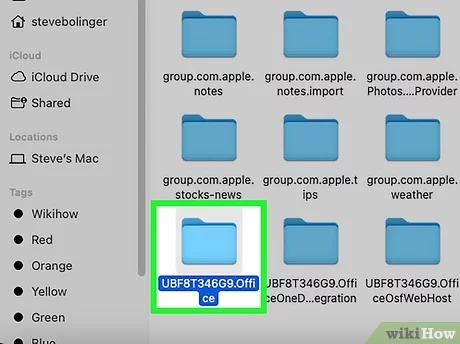
| Step 5 | In the Library folder, locate the “Preferences” folder. |
| Step 6 | Open the “Preferences” folder. |
| Step 7 | Look for the file named “com.microsoft.Word.plist”. This file contains the preferences and settings for Microsoft Word. |
Once you have located the preferences folder and the “com.microsoft.Word.plist” file, you can proceed with resetting Microsoft Word to its default settings on your Mac.
Delete the Word Preferences File

If you want to reset Microsoft Word to its default settings on your Mac, you may need to delete the Word preferences file. This file stores your personal settings and preferences for Word, and deleting it will remove any customizations you have made.
To delete the Word preferences file, follow these steps:
- Close Microsoft Word if it is open.
- Open Finder and click on the “Go” menu in the top menu bar.
- Hold down the “Option” key on your keyboard and click on the “Library” option that appears.
- In the Library folder, navigate to the “Preferences” folder.
- Find the file named “com.microsoft.Word.plist” and move it to the trash.
- Empty the trash to permanently delete the preferences file.
Once you have deleted the Word preferences file, you can reopen Microsoft Word and it will be reset to its default settings. Any customizations you had made will be gone, so make sure to back up any important settings or preferences before deleting the preferences file.
Step 3: Restart Microsoft Word
After resetting Microsoft Word to its default settings on your Mac, the next step is to restart the application. This will ensure that all the changes you made take effect and that you can start using Word with its default settings.
To restart Microsoft Word, follow these simple steps:
| 1. | Click on the “Microsoft Word” icon in your dock or go to the “Applications” folder and double-click on the “Microsoft Word” application. |
| 2. | Wait for Microsoft Word to launch and open a new blank document. |
| 3. | Verify that the default settings have been restored by checking if any customizations or preferences you made before have been reset. |
Once you have restarted Microsoft Word, you can start using it with its default settings. If you want to customize Word again, you can do so by going to the “Preferences” or “Options” menu within the application.
By following these steps, you have successfully reset Microsoft Word to its default settings on your Mac and can now use it without any customizations or preferences that may have been causing issues.


